The all-in-one automation suite for brand identity designers
Works with Adobe Illustrator 2021 - 2026
Deliver flawless
Everything you need, in one poweful suite


Try Akrivi Studio, includes automated templates that generates layouts for you
How to Make a Logo Grid (Adobe Illustrator Step-by-Step Guide)

Learn how to make a logo grid in Adobe Illustrator - a simple step-by-step guide.
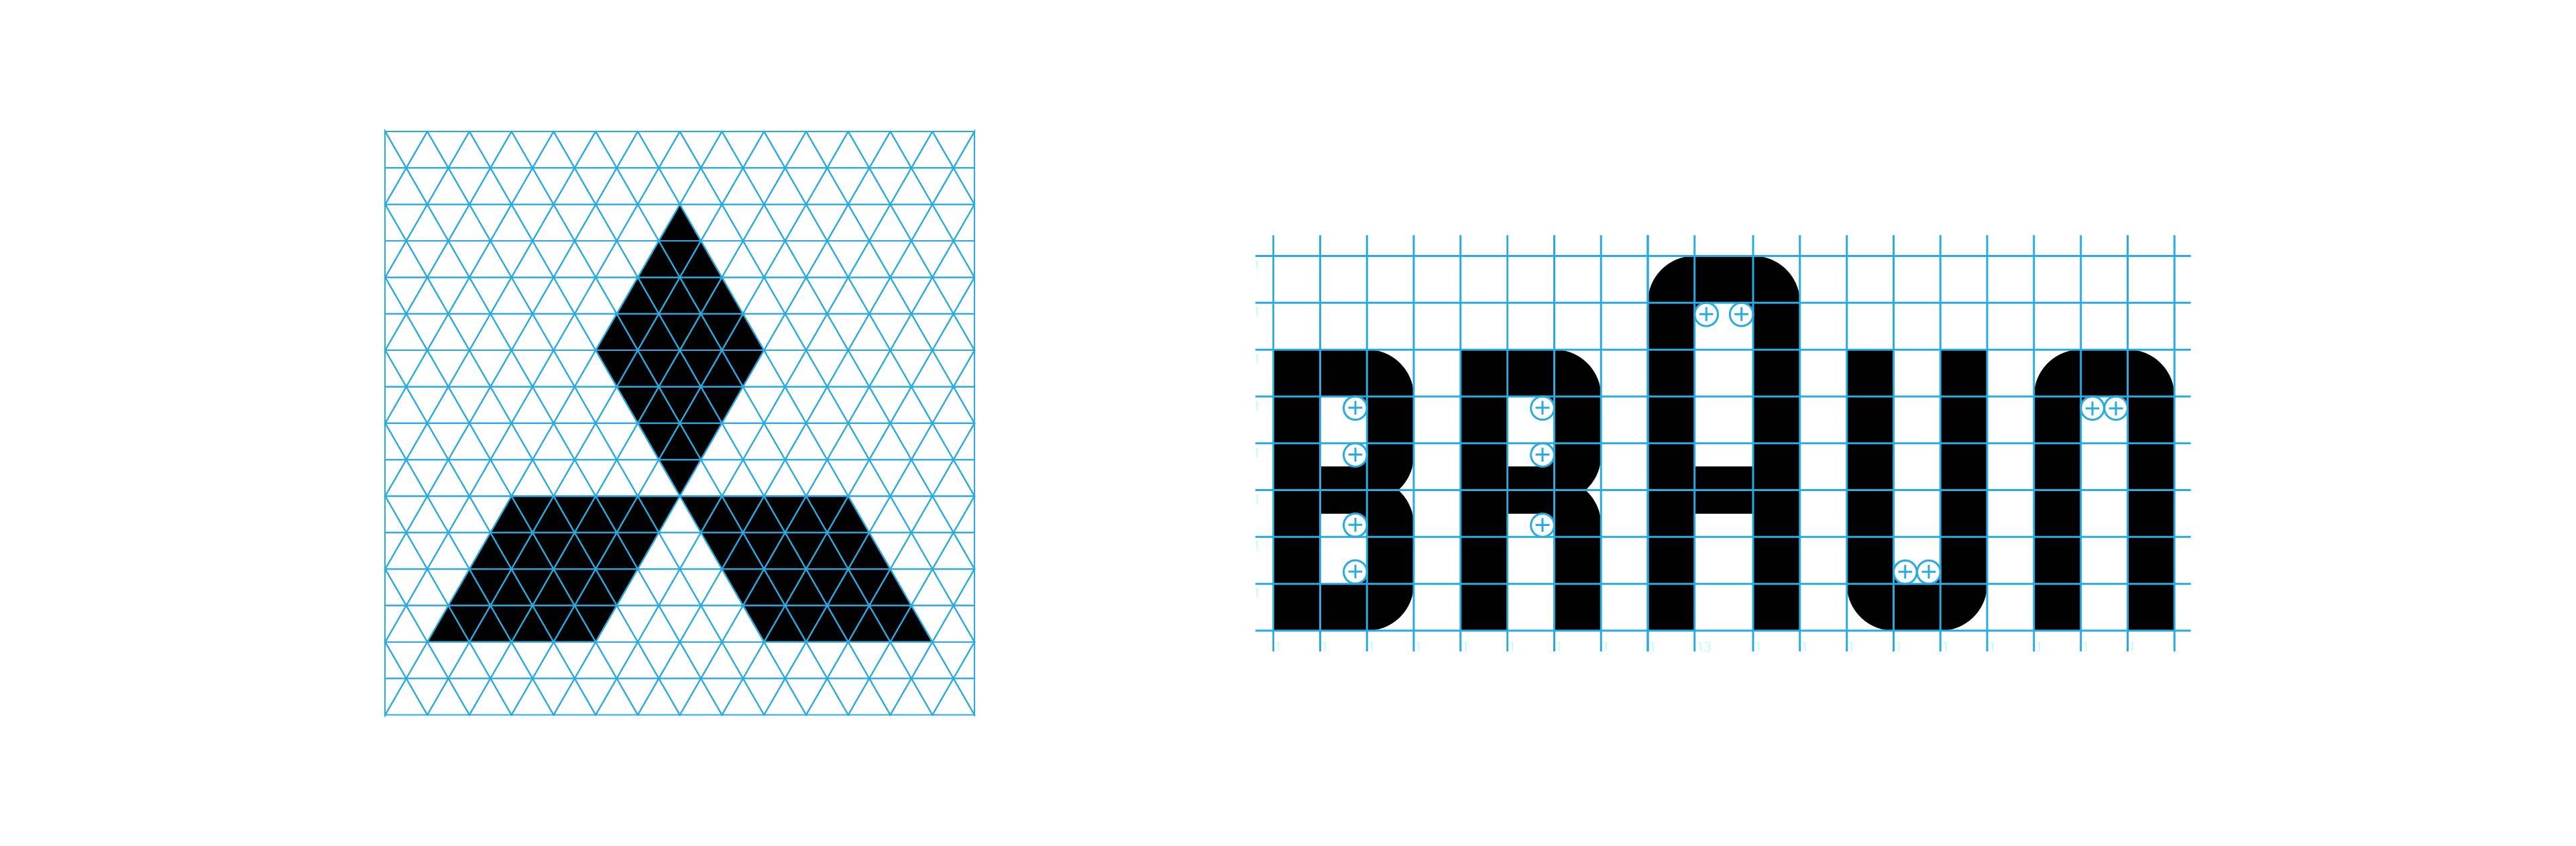
Every logo needs structure, and that’s where grids come in. The type of grid you use depends on the kind of logo you’re creating and when you apply it.
If you’re designing a geometric logo, you’ll usually start with a base grid.
There are several ways to create base grids in Adobe Illustrator. Some are fast, some are more manual, and a few can get messy if you’re not careful.
In this guide, I’ll show you how to create a clean, accurate logo base grid in Illustrator.
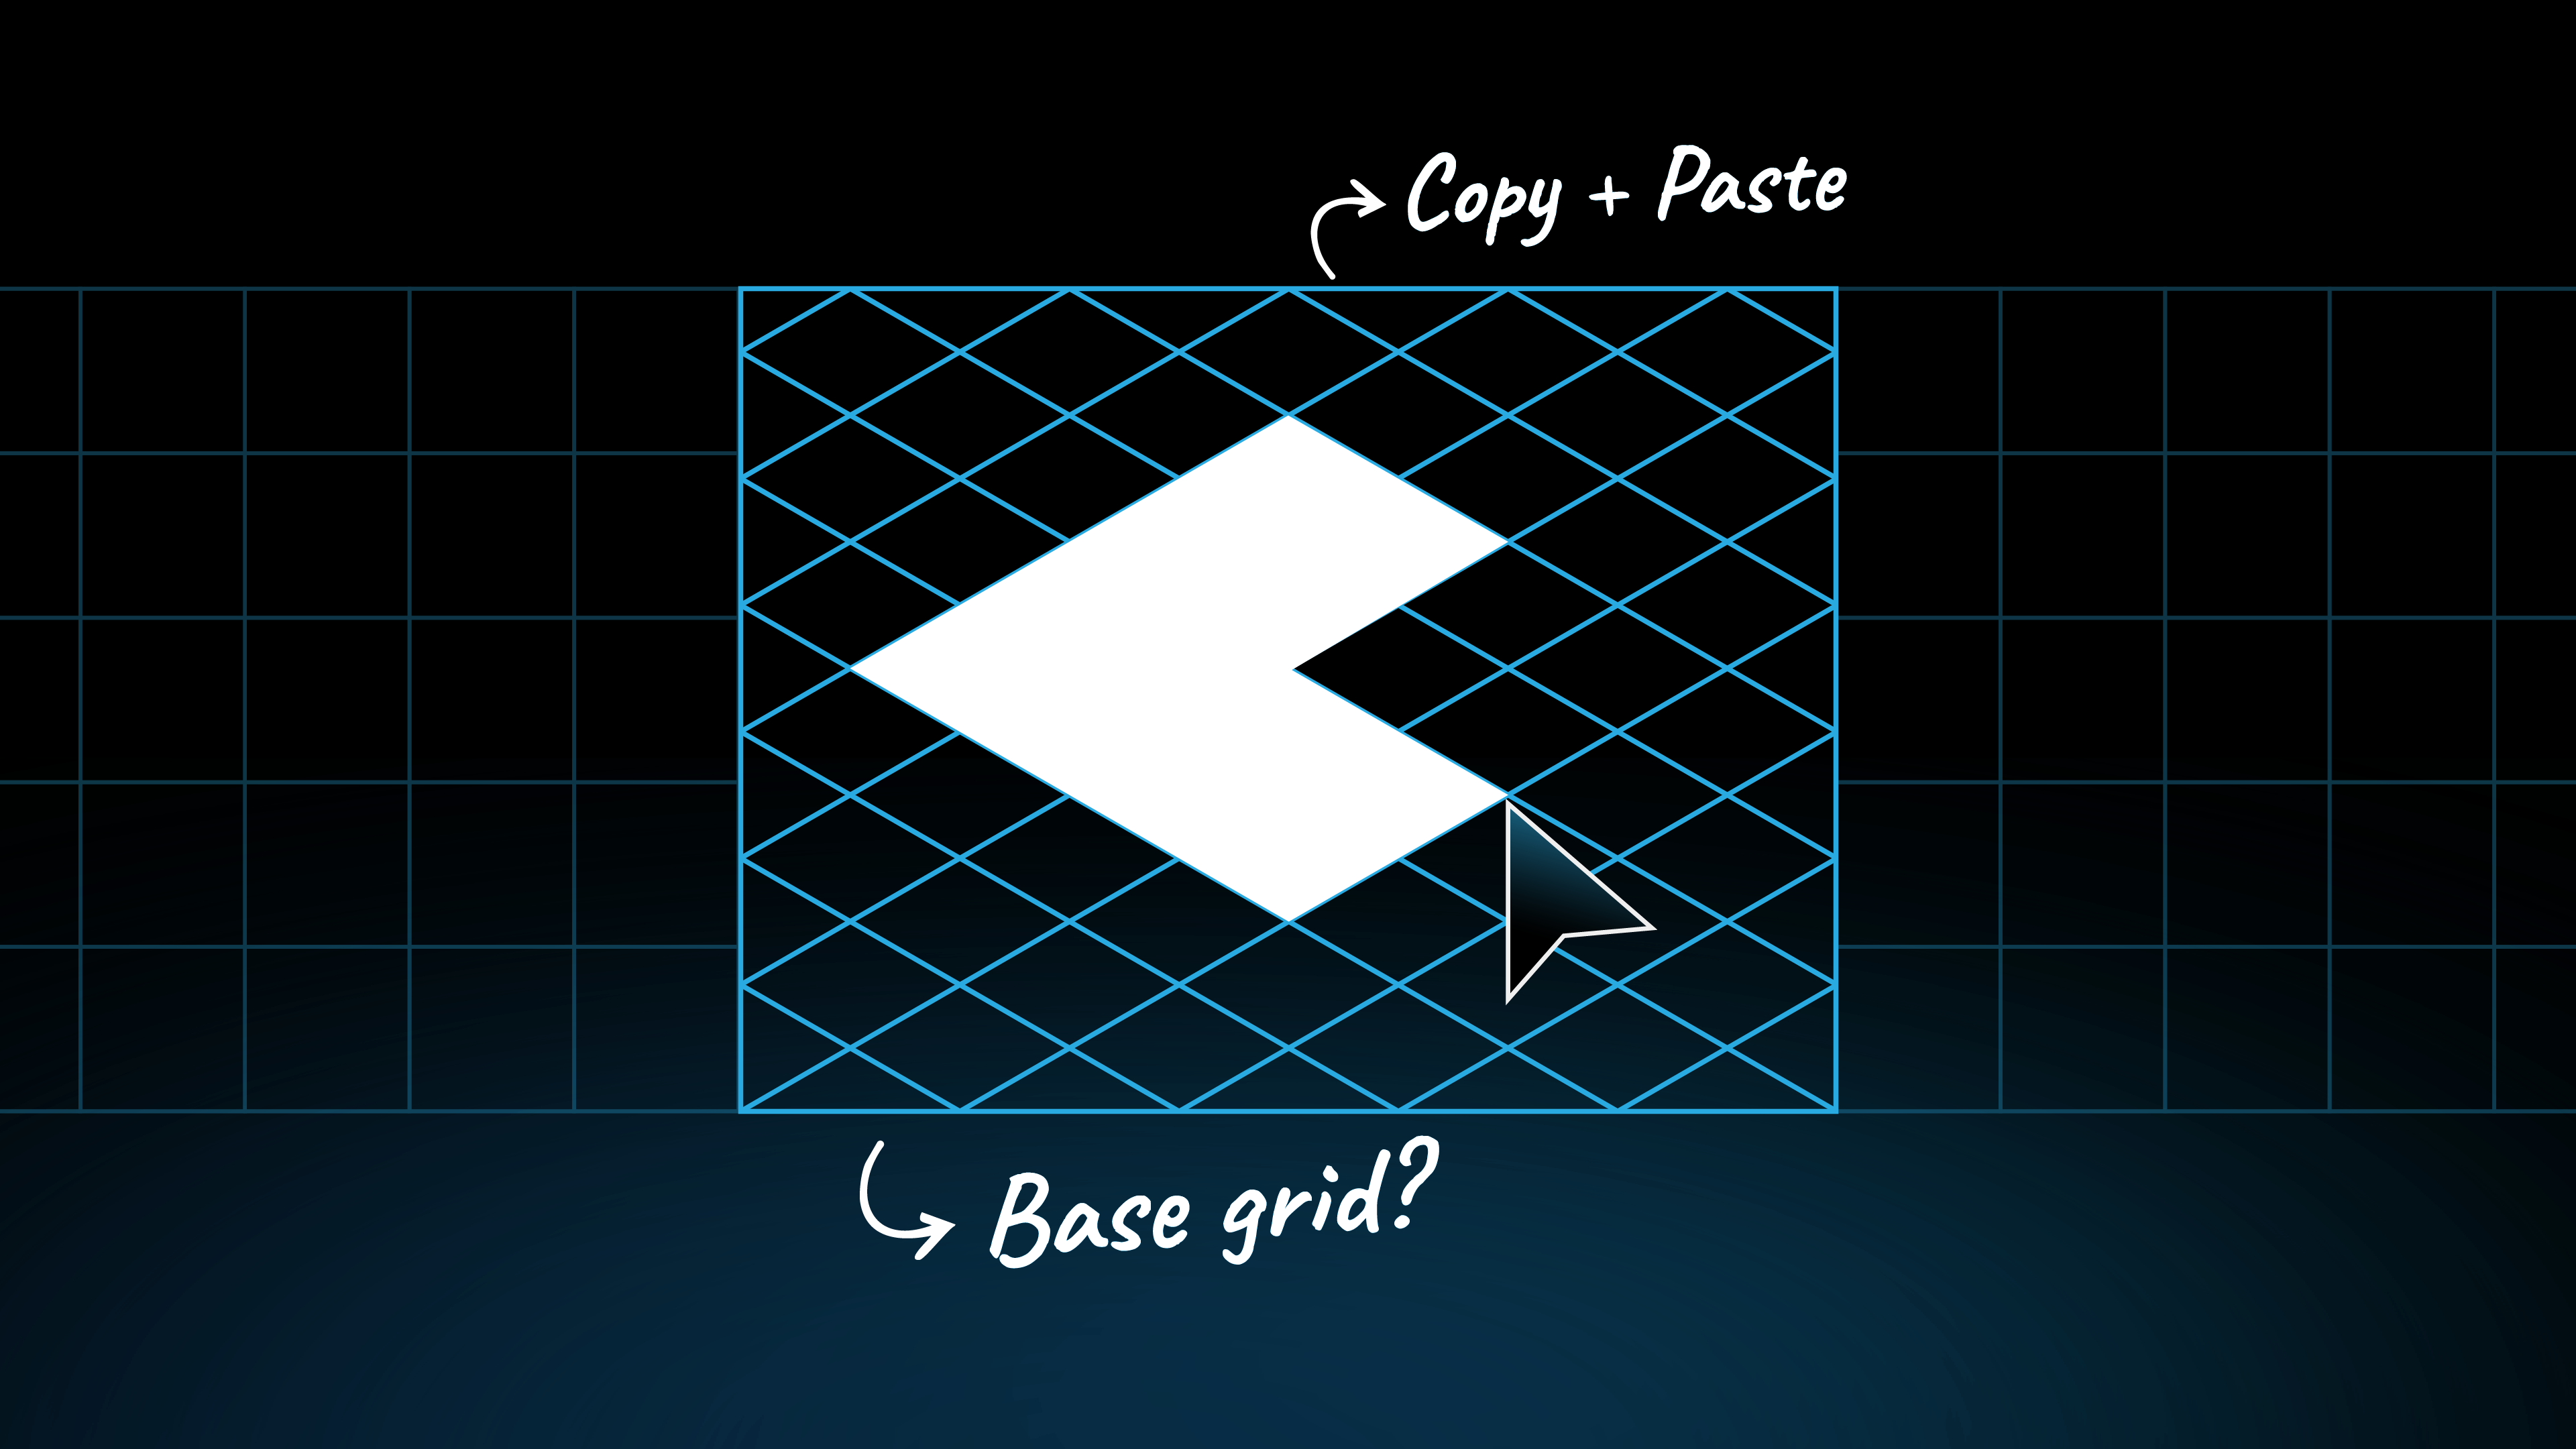
What is a Base Grid?
A base grid is a grid system you create at the very beginning of your logo design process, before you start vectorising the logo.
It helps you build shapes and proportions that are balanced, consistent, and aligned from the start, setting the foundation for a strong final design. Those things may take a lot of time, which is why I build tools to automate them.
I dive deeper into the different type of logo grids systems in a previous post.
How to Make a Square Base Grid Manually in Adobe Illustrator
For the first guide, we'll create a simple square base grid.
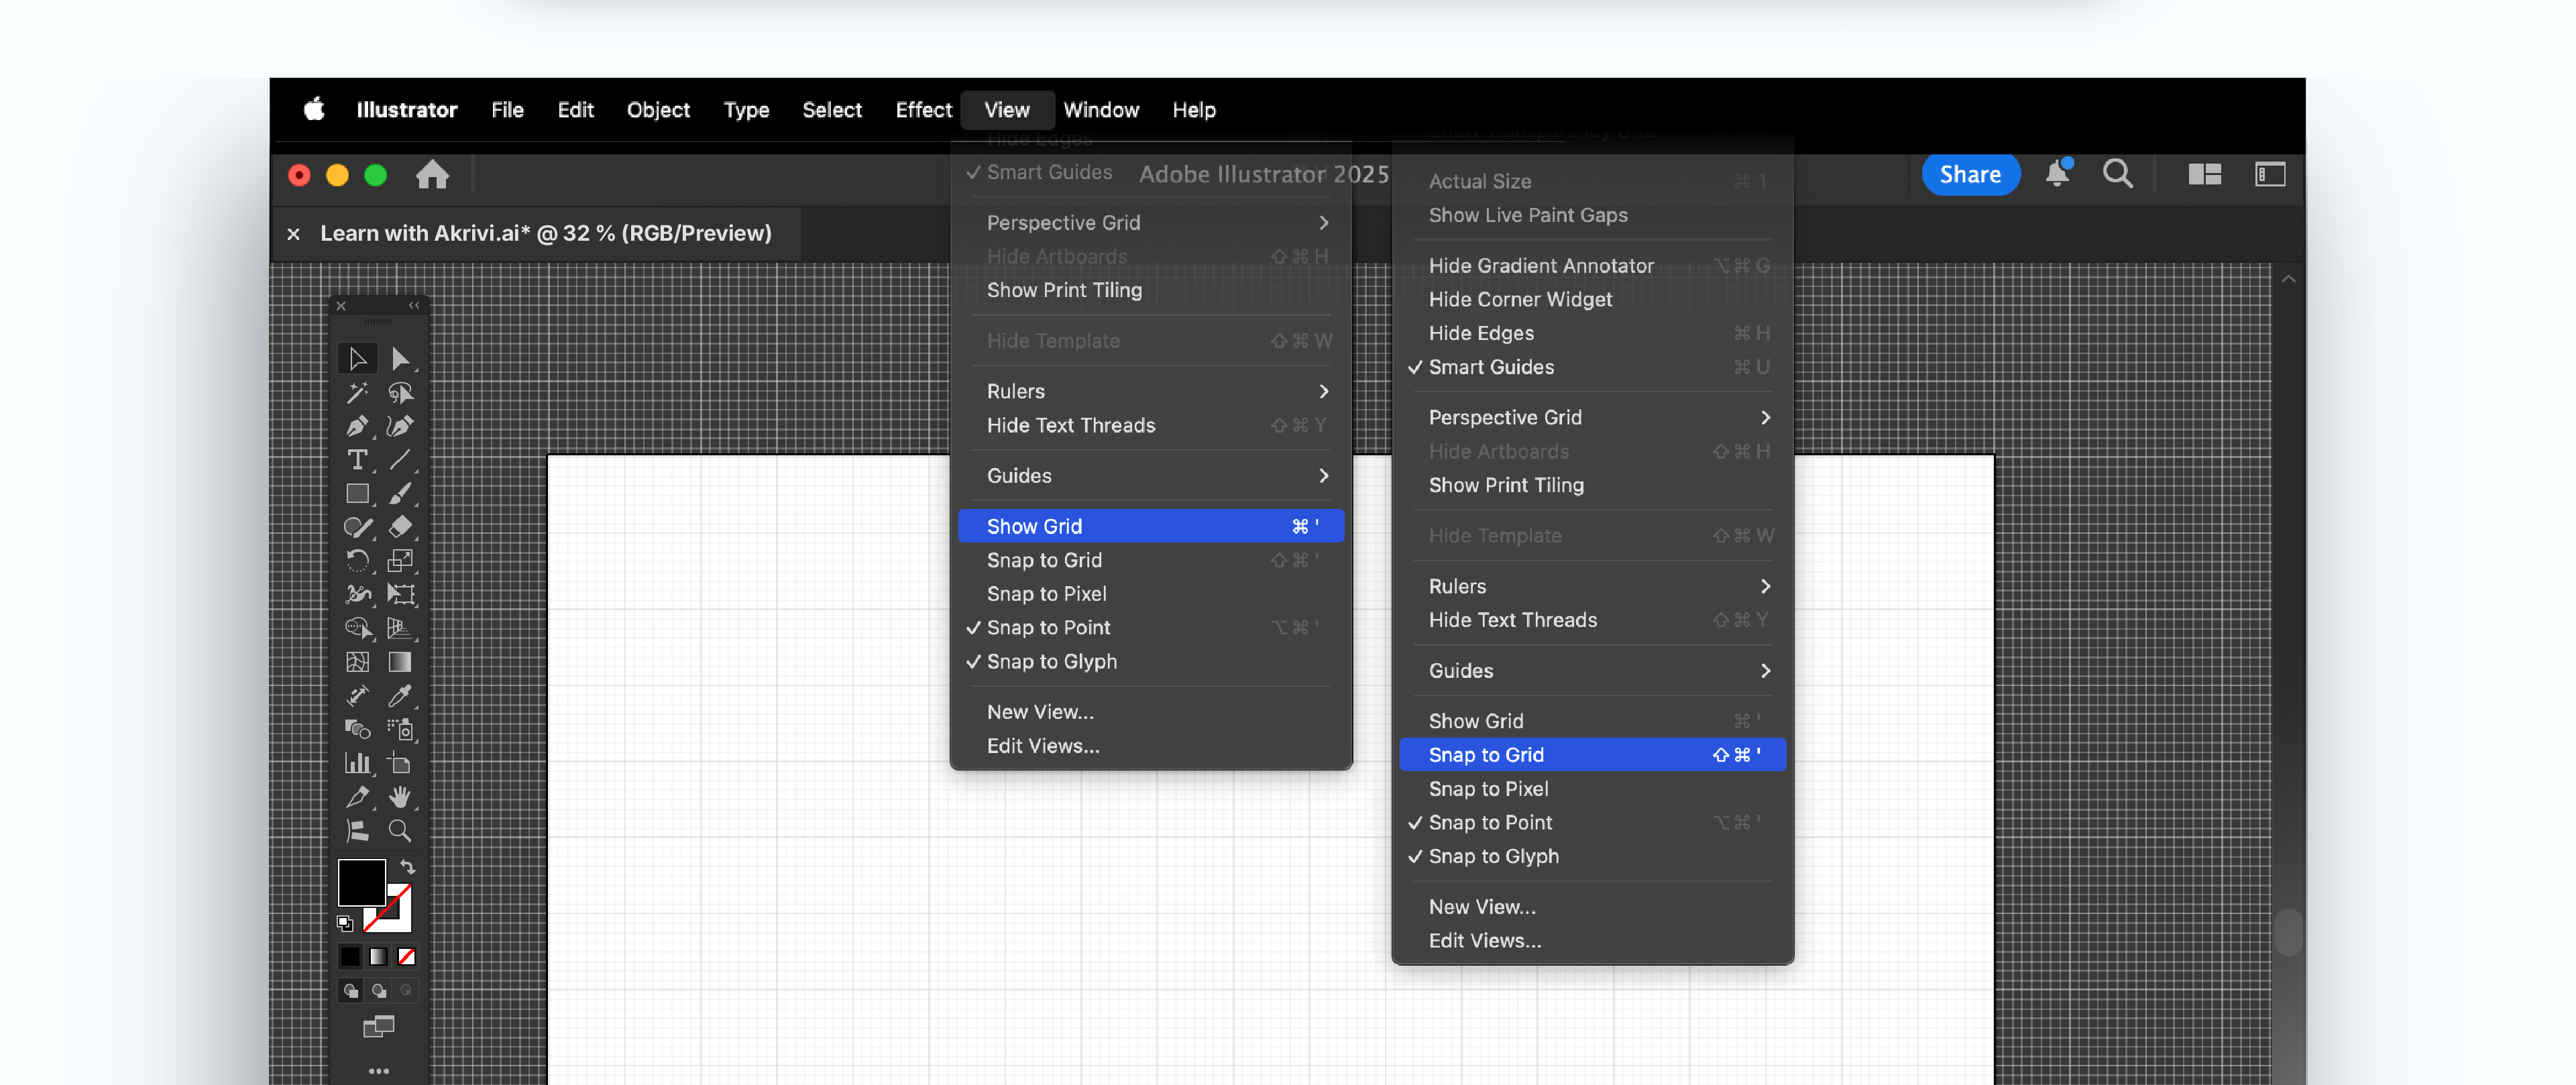
Step 1: Set Up Your Document and Grid.
- Open Adobe Illustrator. Create a new document.
- Go to View > Show Grid. This makes Illustrator's default grid visible.
- Enable View > Snap to Grid. This makes drawing and aligning much easier.
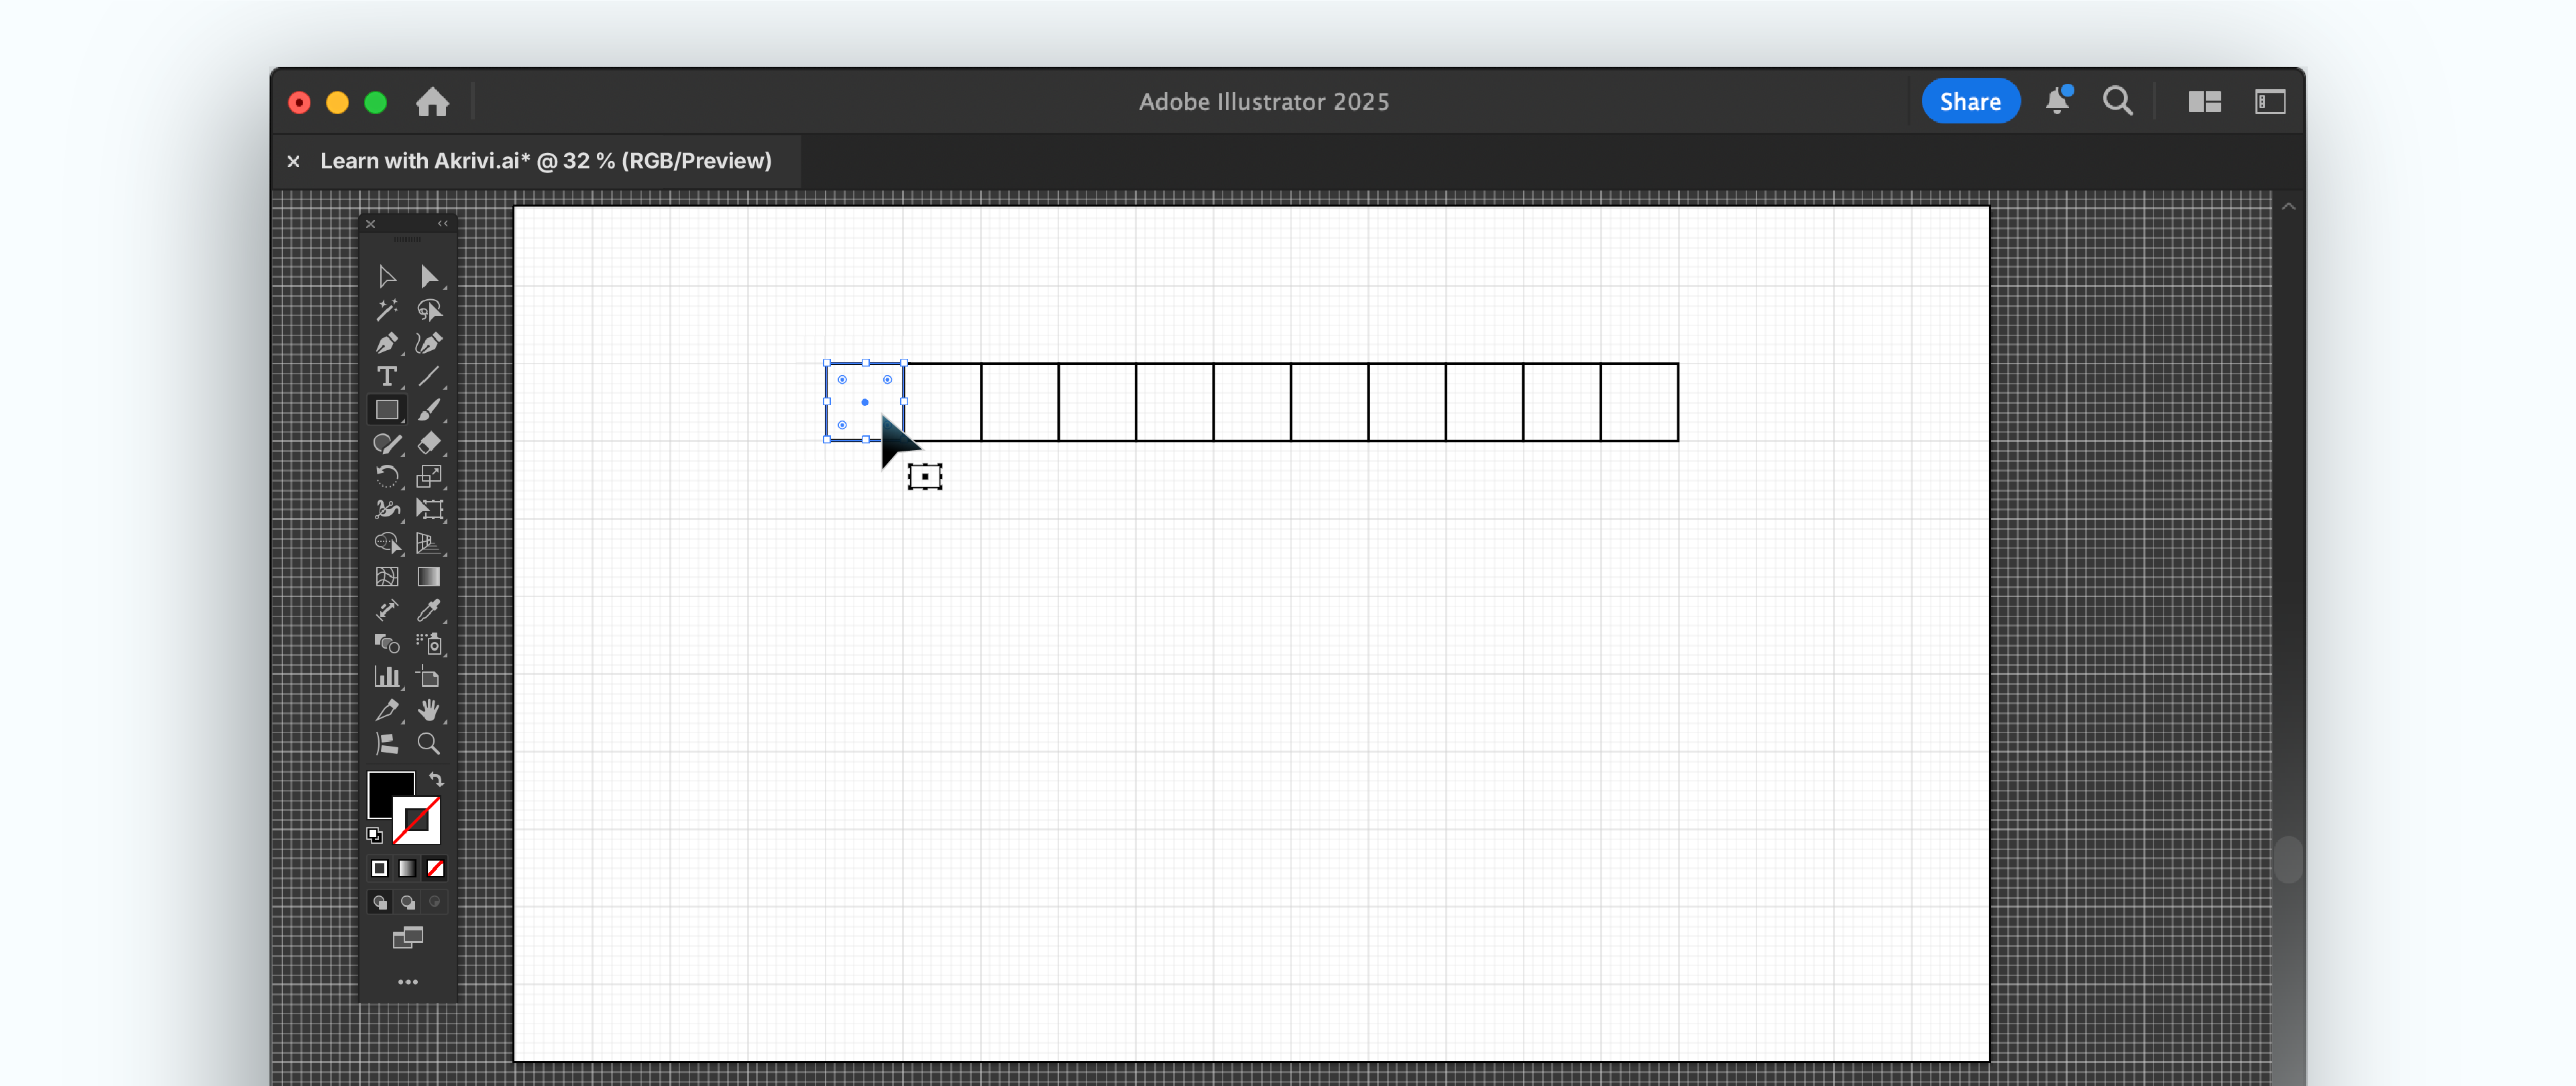
Step 2: Draw Your First Square & Duplicate
- Select the Rectangle Tool (M). Click and drag while holding Shift. This creates a perfect square.
- Make sure it snaps perfectly to the visible grid lines.
- Hold Alt (Windows) or Option (Mac) and drag a copy of your square horizontally. It should snap to the next grid point.
- Press Ctrl + D (Windows) or Cmd + D (Mac) repeatedly. This duplicates the square at the same spacing, creating a row of squares. Extend this to your desired width.
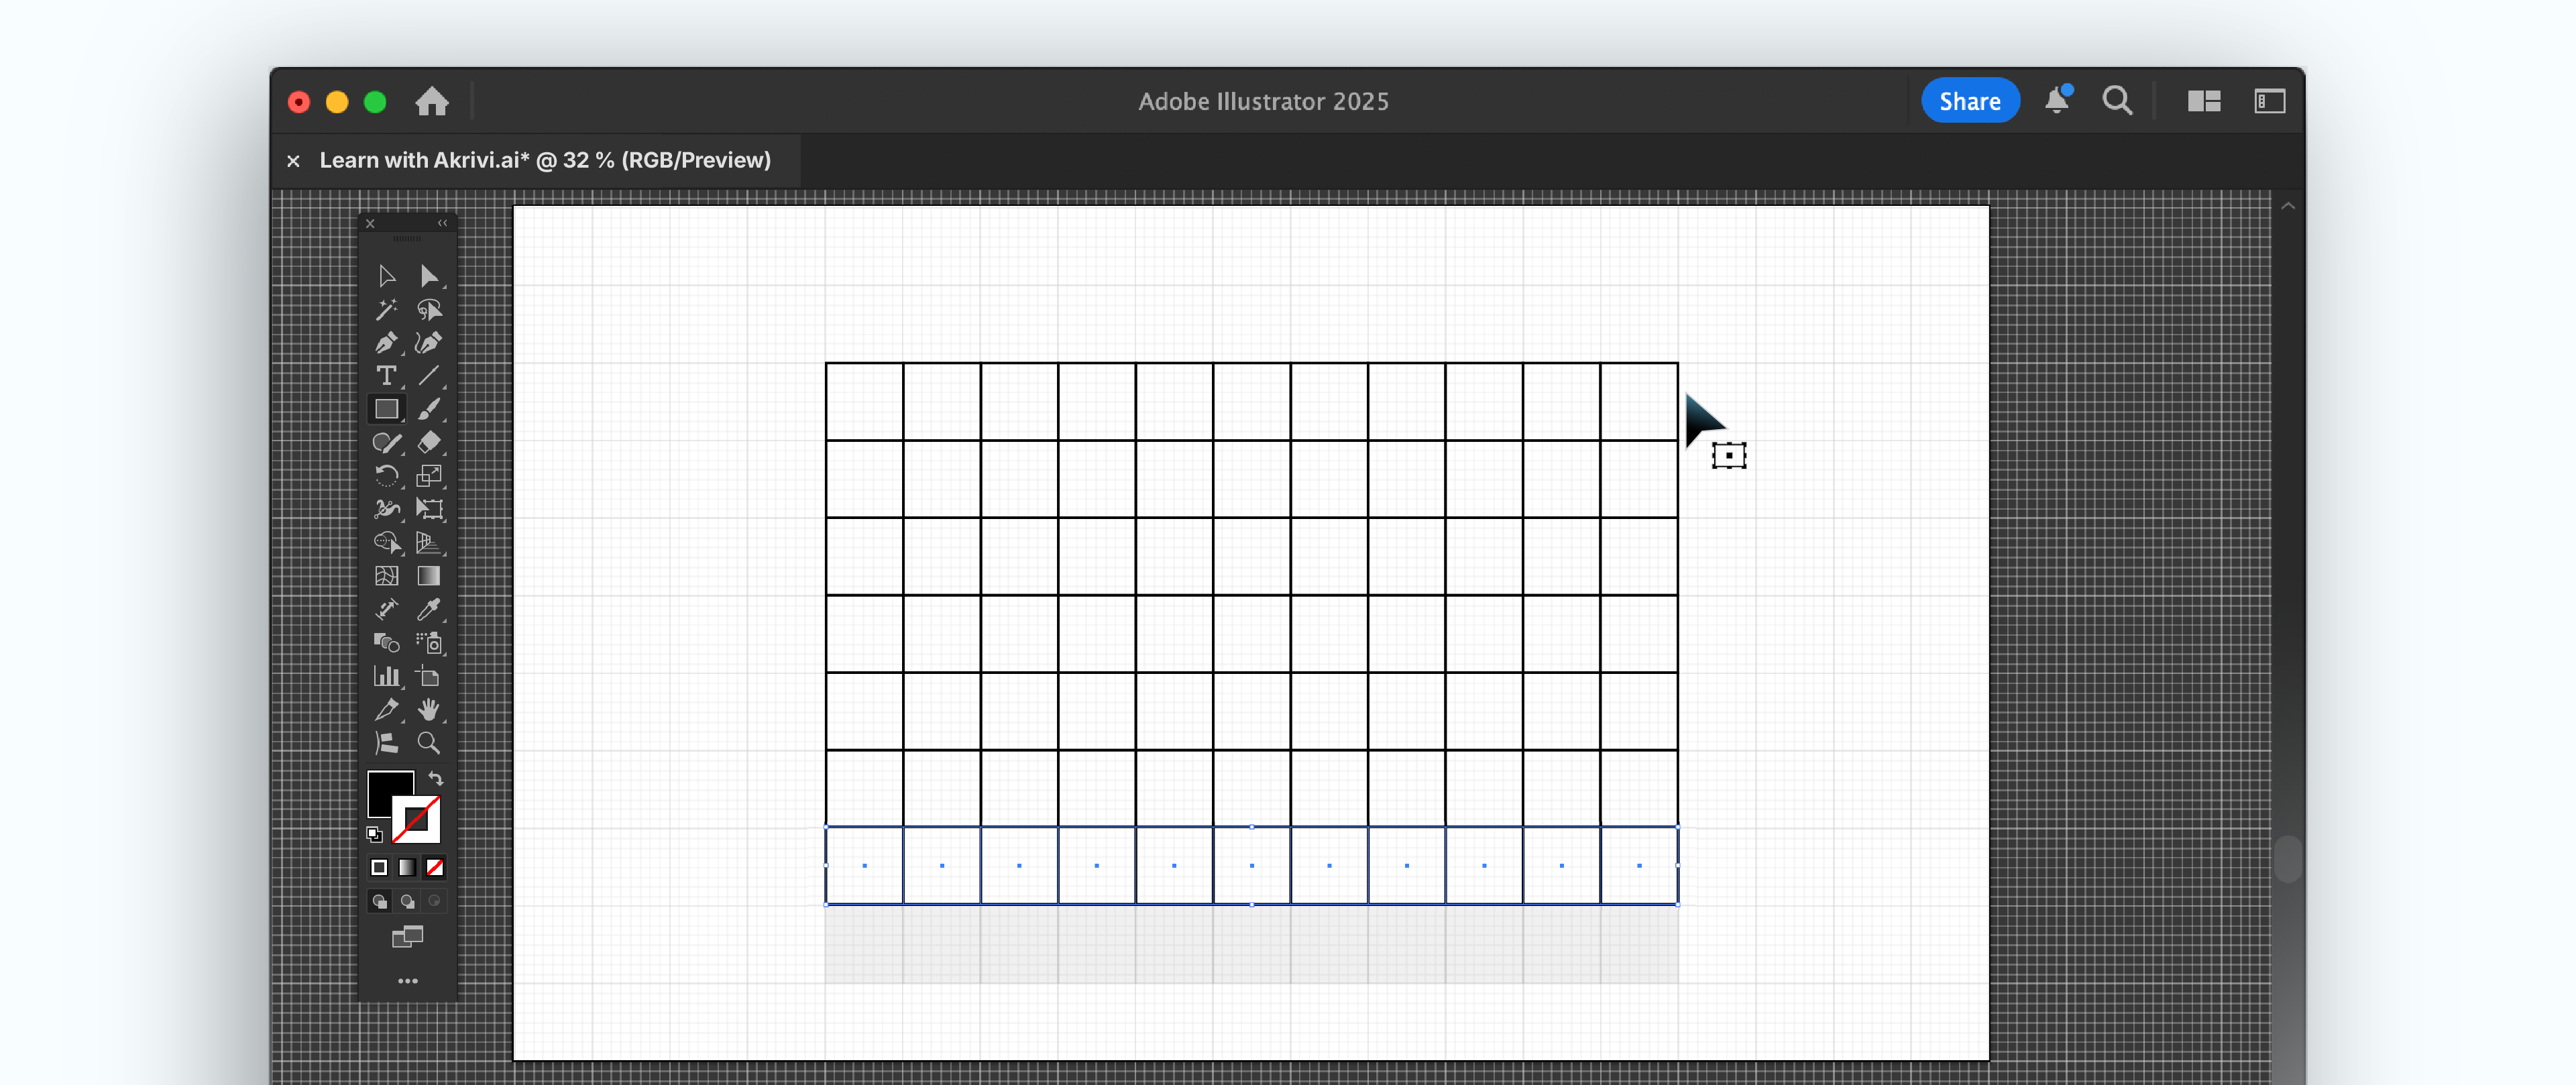
Step 4: Duplicate Vertically.
- Select all the squares in your horizontal row.
- Hold Alt (Windows) or Option (Mac) and drag a copy of the entire row downwards. It should snap to the grid below the first row.
- Press Ctrl + D (Windows) or Cmd + D (Mac) repeatedly. This duplicates the row, creating your full square grid. Extend this to your desired height.
Step 5: Group and Lock.
- Select all the squares that form your grid. Group them (Ctrl/Cmd + G).
- Lock the layer (or press Ctrl/Cmd + 2) so your grid stays put while you design.

How to Make an Isometric Grid Manually in Adobe Illustrator
Now for something a little more tricky - Isometric base grid:
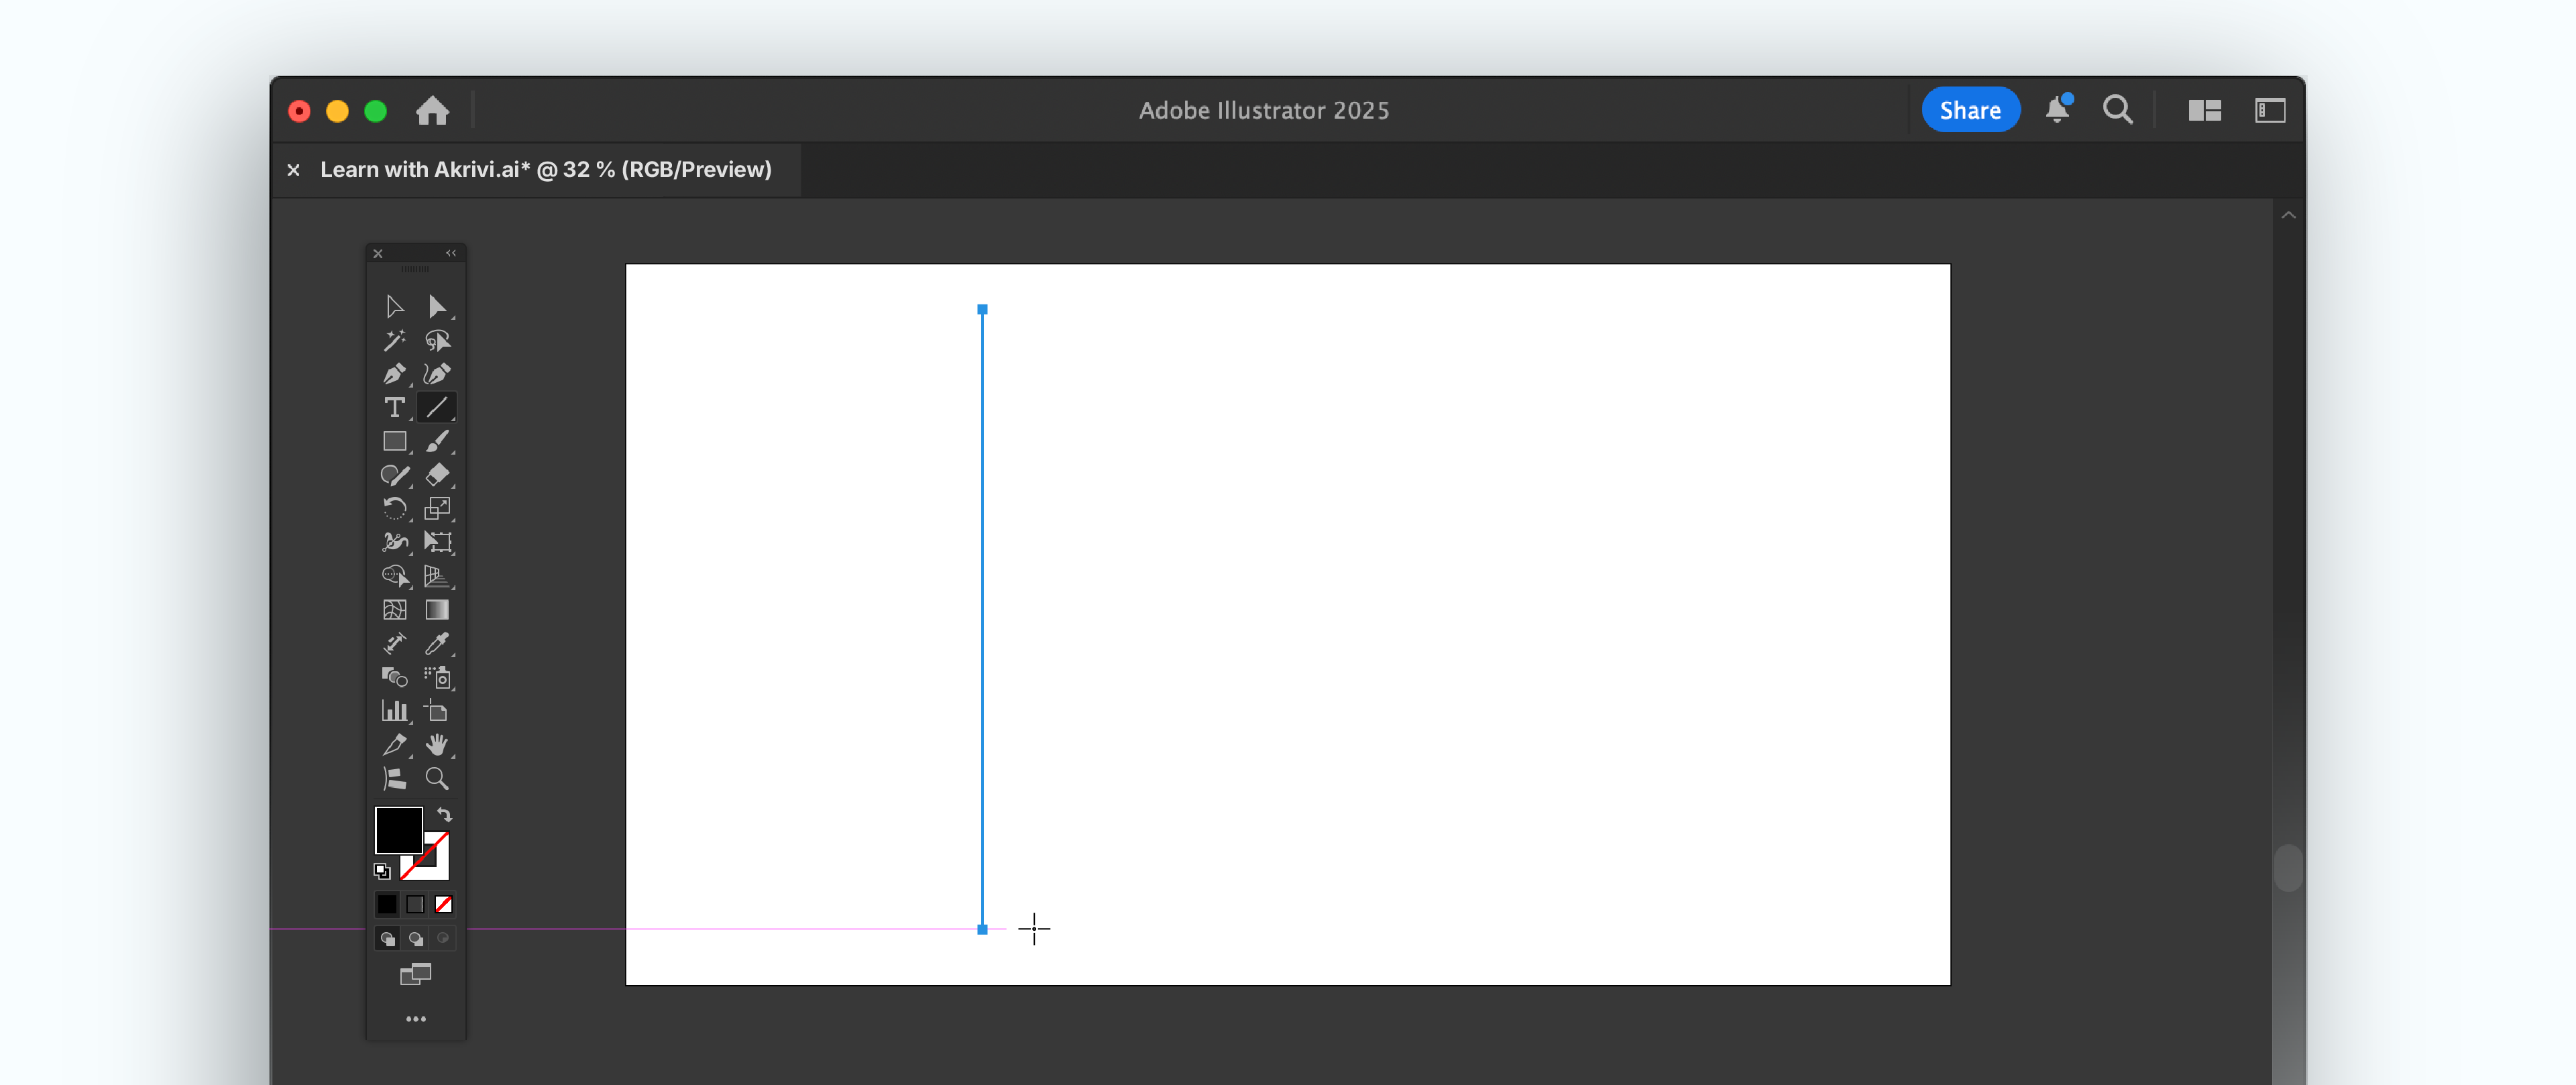
Step 1: Draw the First Line.
- Start with a clean artboard. Use the Line Segment Tool (\). Draw a straight vertical line.
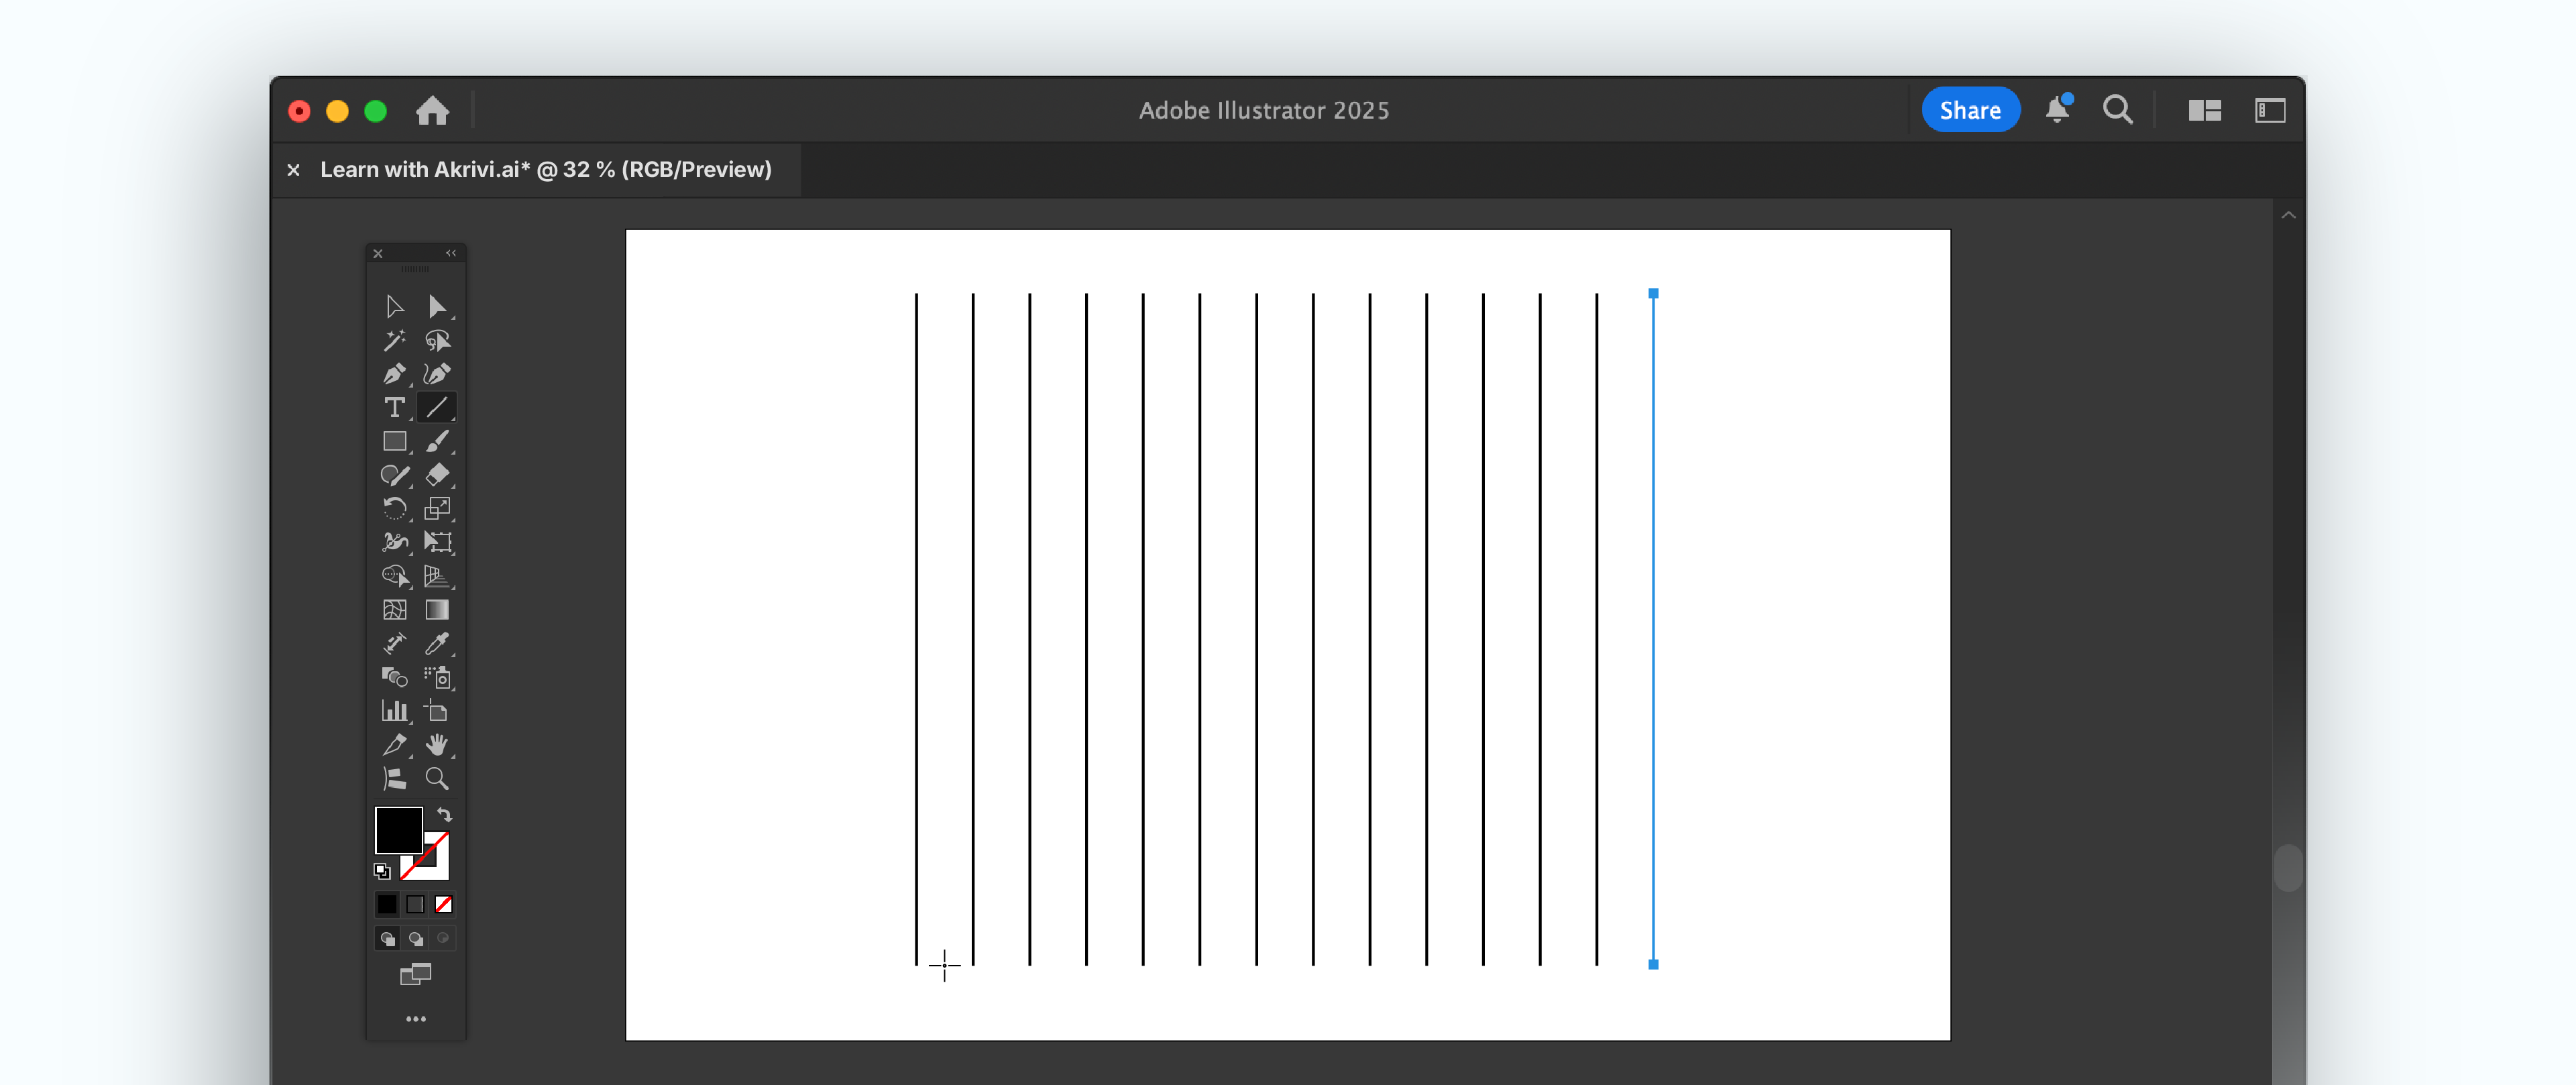
Step 2: Duplicate for Angled Lines (First Direction).
- Hold Alt (Windows) or Option (Mac) and drag a copy to the right. Ensure the spacing is even.
- Press Ctrl + D (Windows) or Cmd + D (Mac) to repeat this many times. This creates a series of vertical lines.
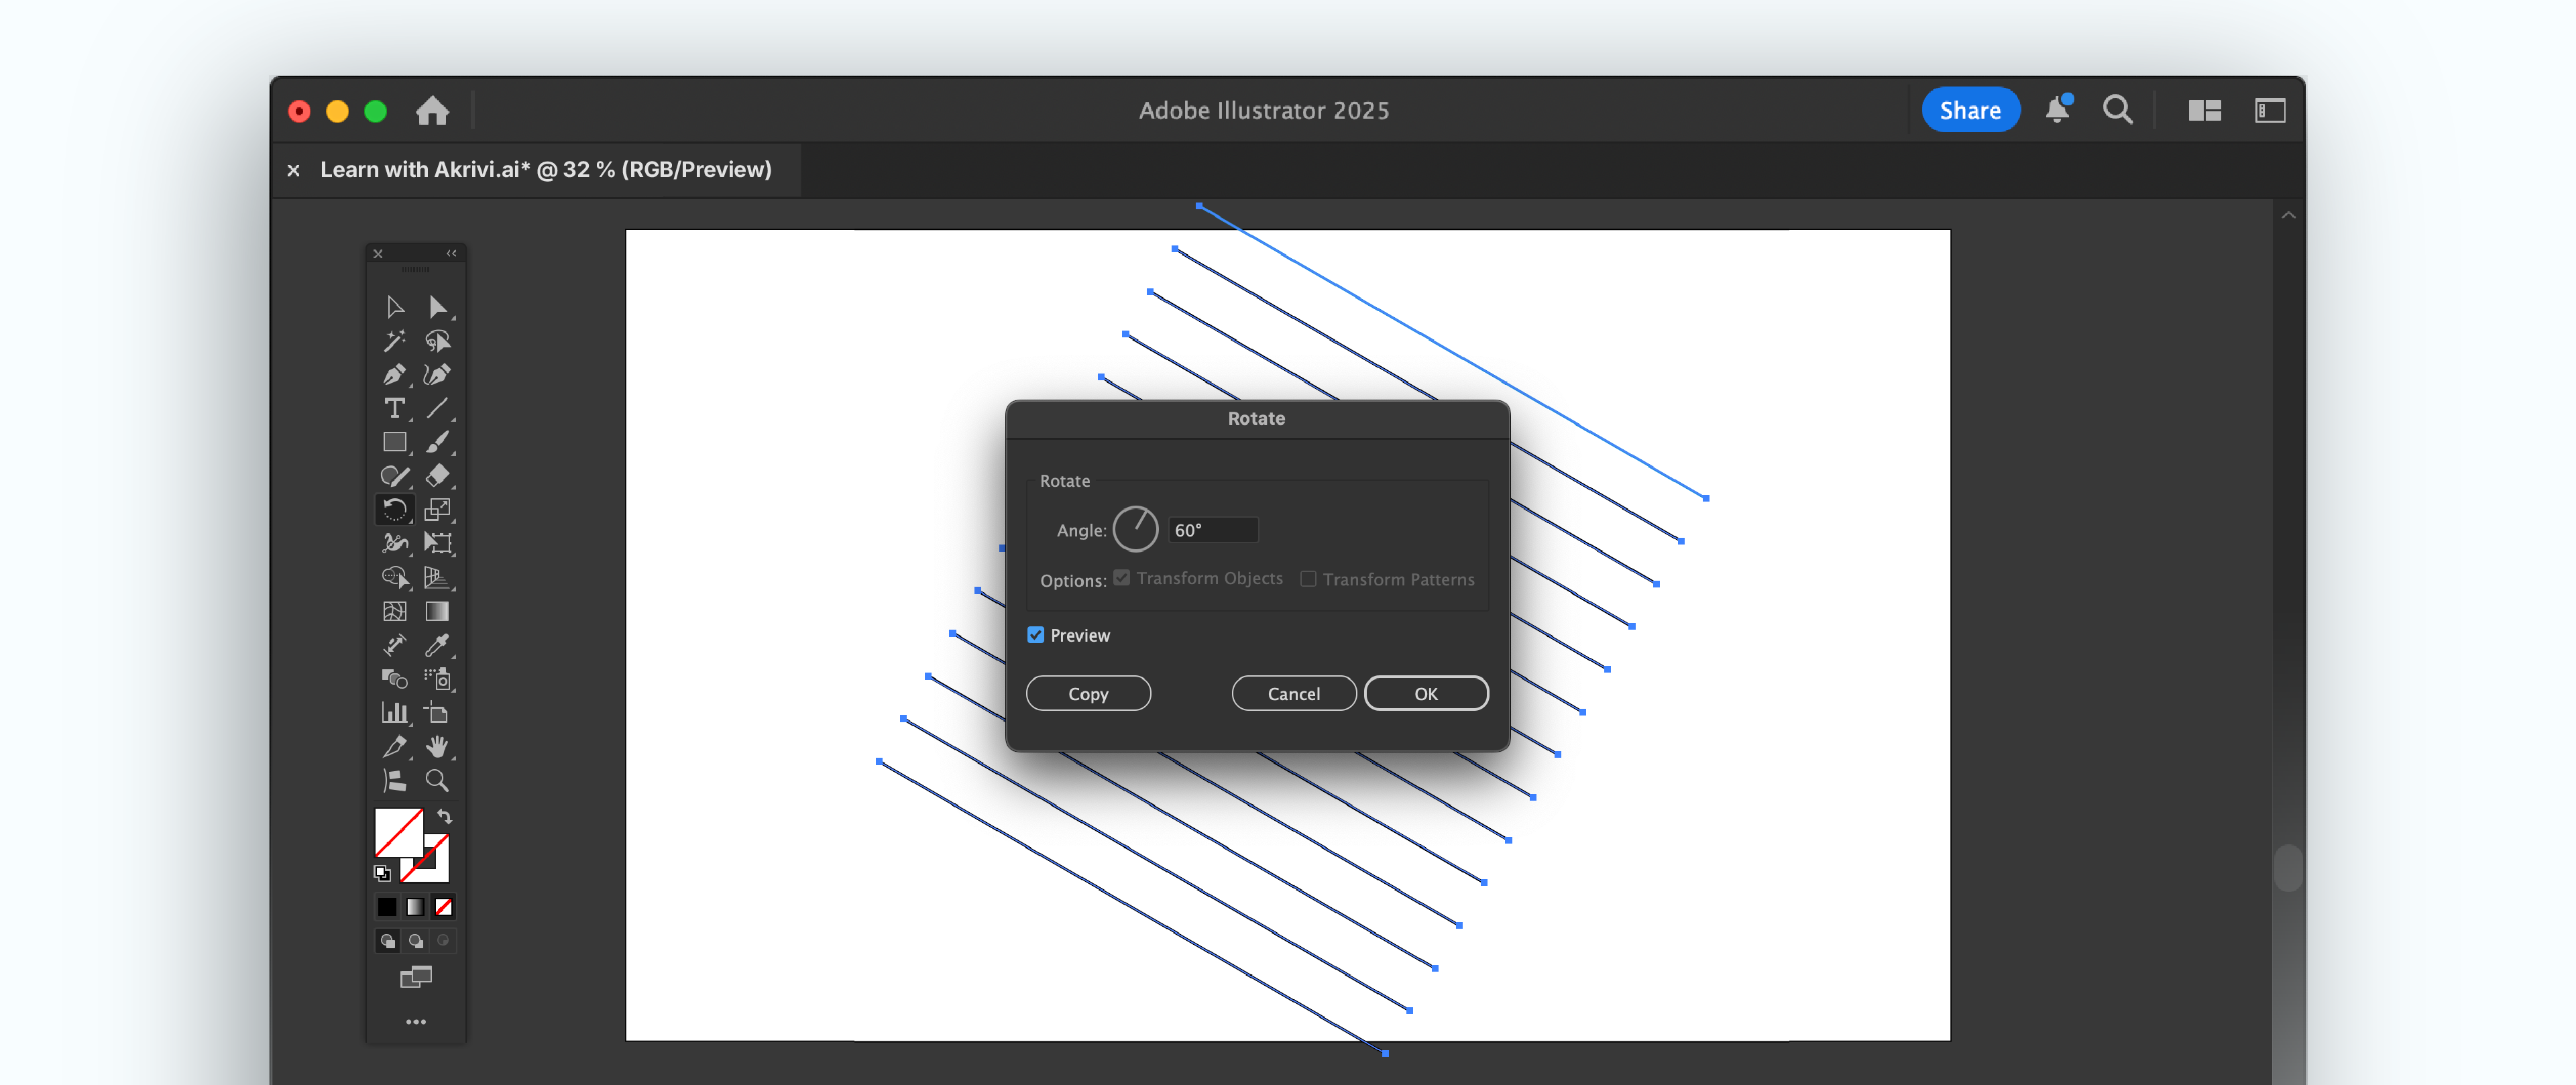
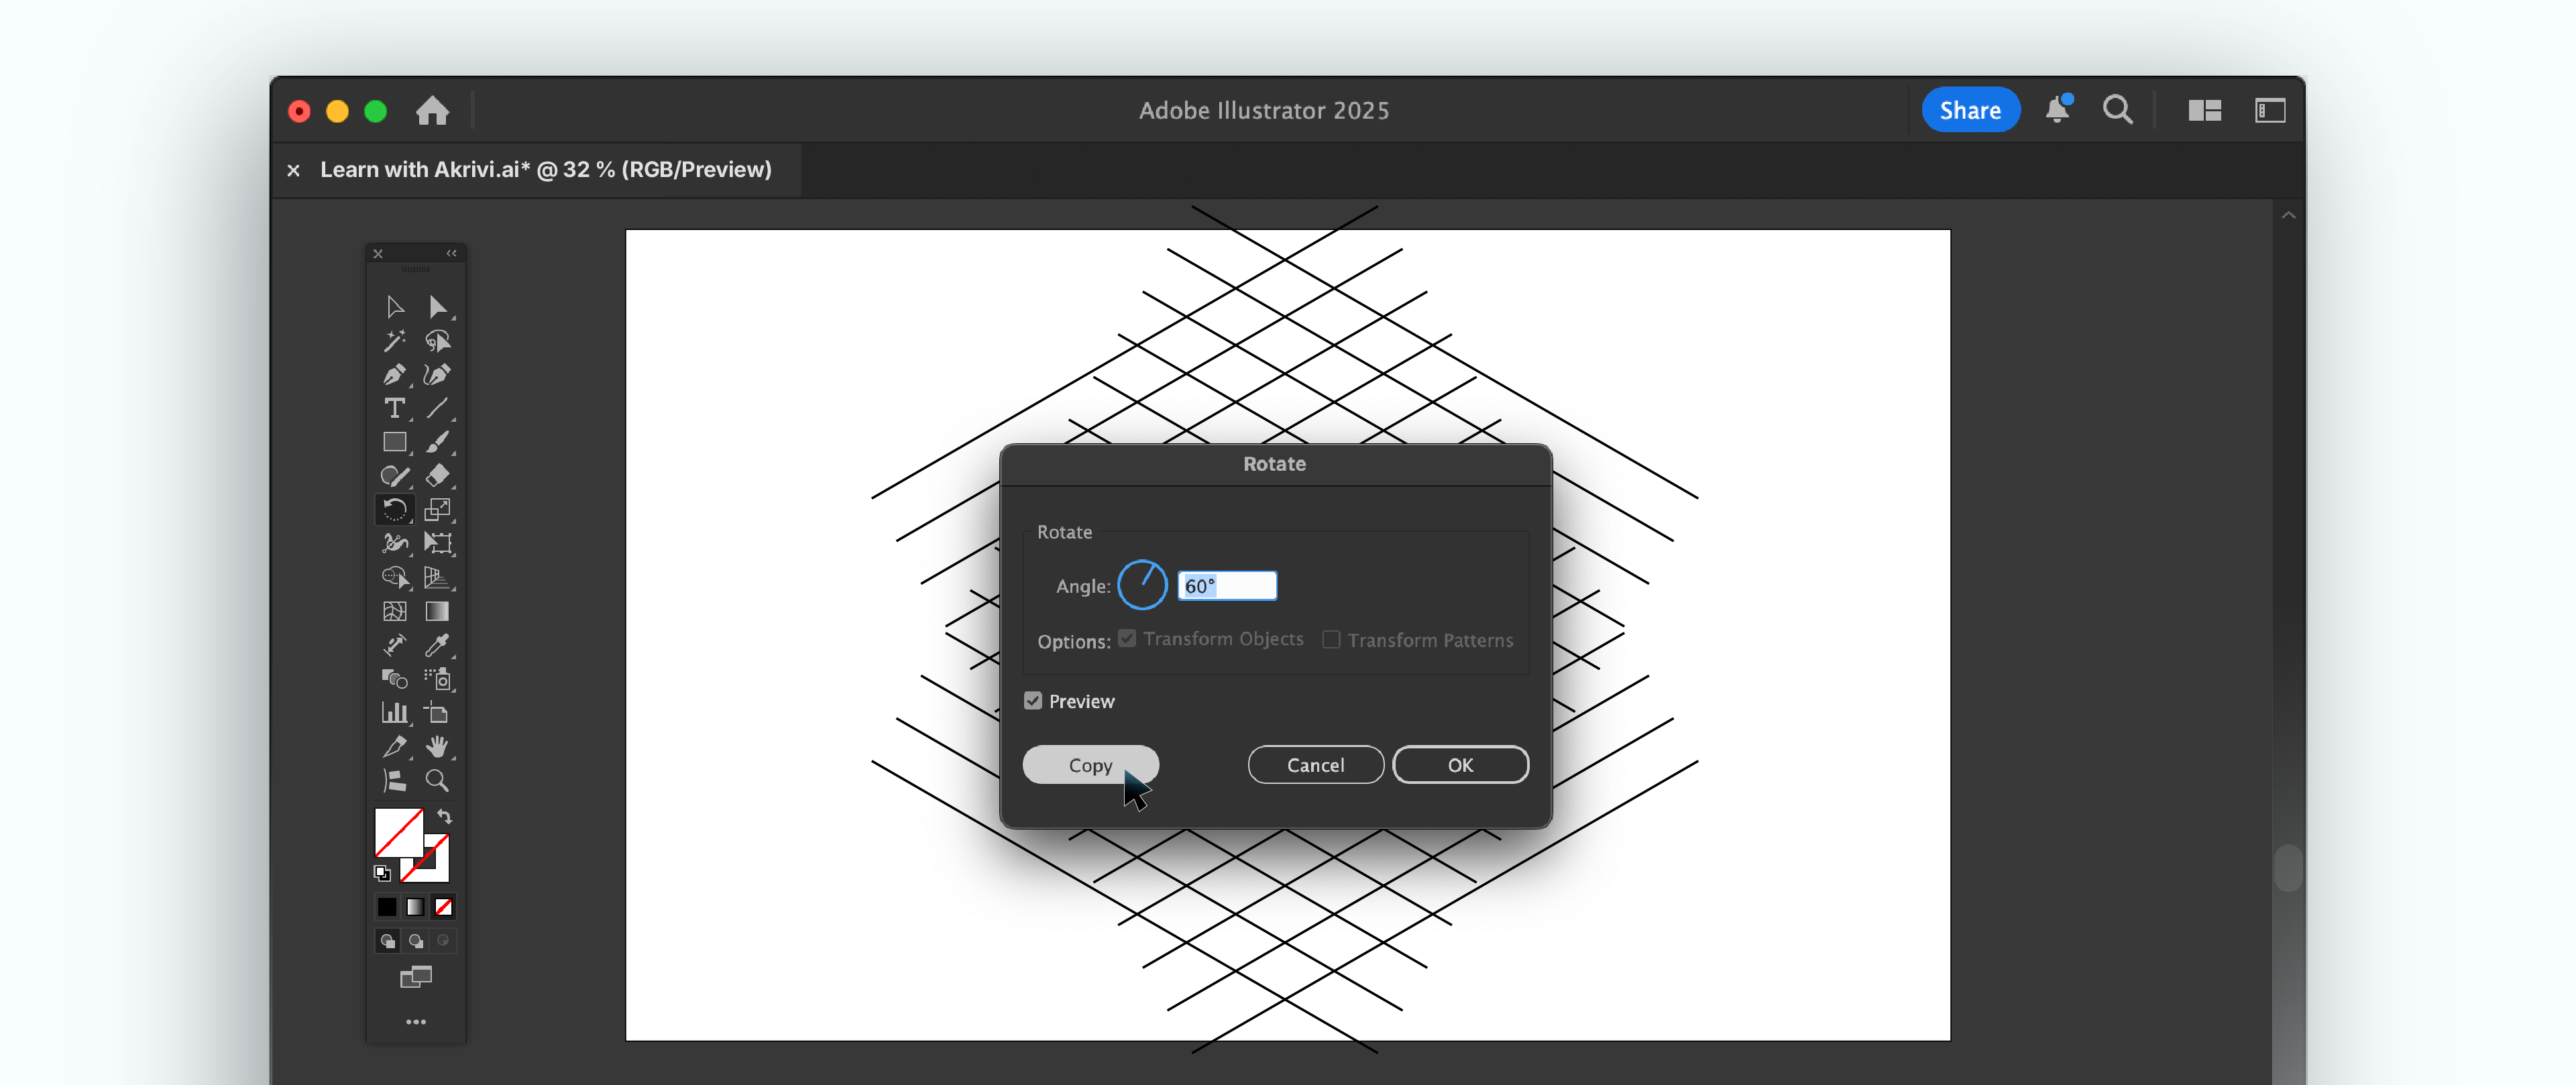
Step 3: Group and Rotate.
- Select all these vertical lines. Group them (Ctrl/Cmd + G).
- Double tap Rotate tool in toolbar, then add Angle > Enter 60 degrees. These lines will now angle.
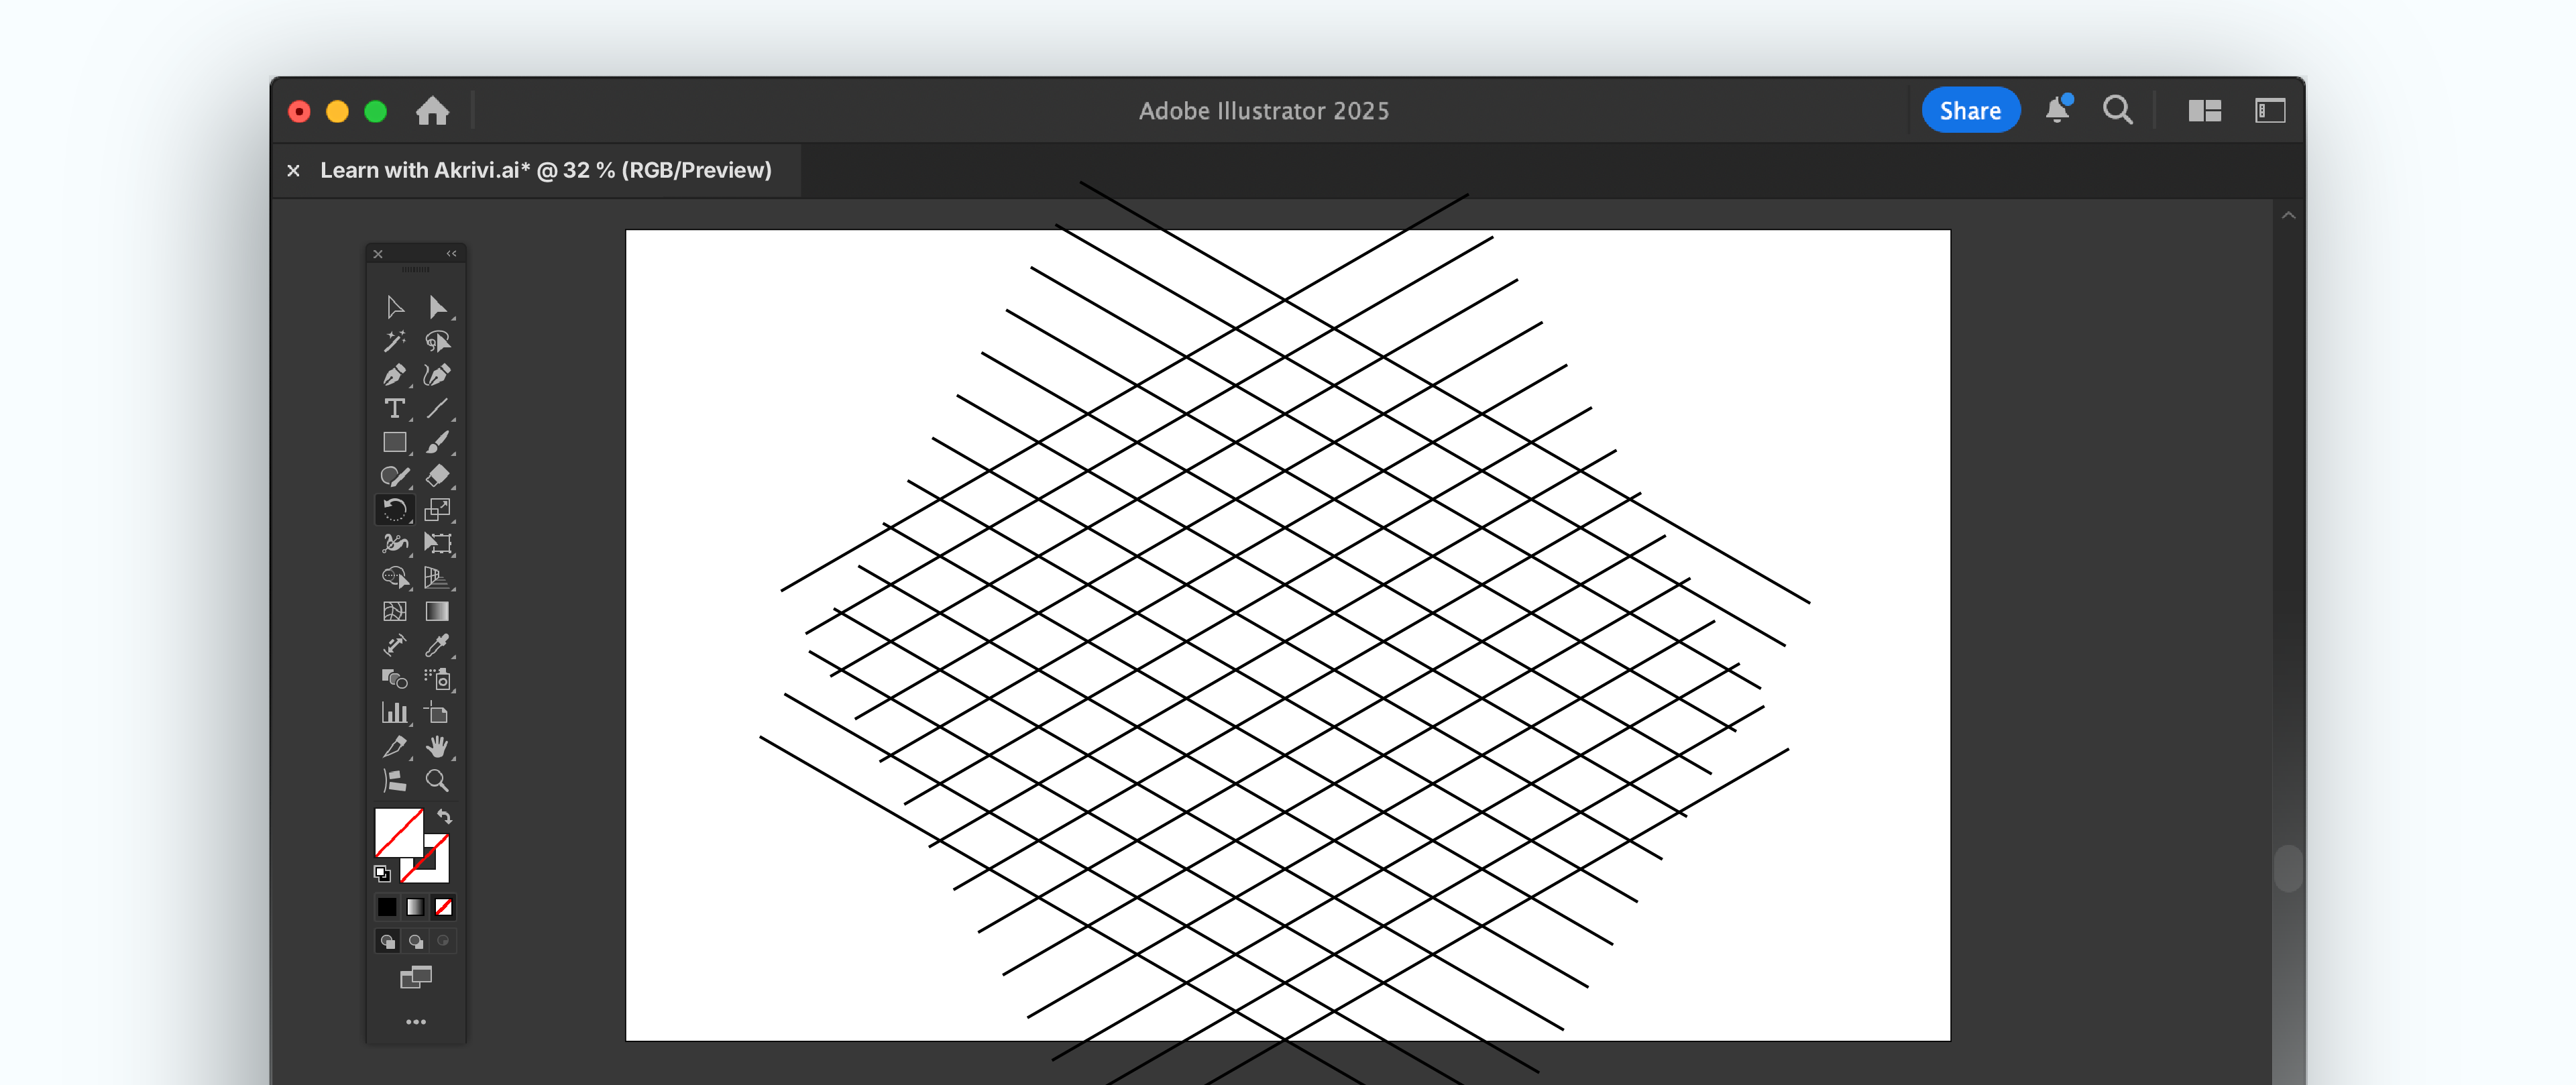
Step 4: Rotate for Second Direction.
- Keep selection on the diagonal lines.
- Double tap the Rotate tool again, for Angle > Leave it at 60 degrees. But this time, Instead of OK you tap Copy.
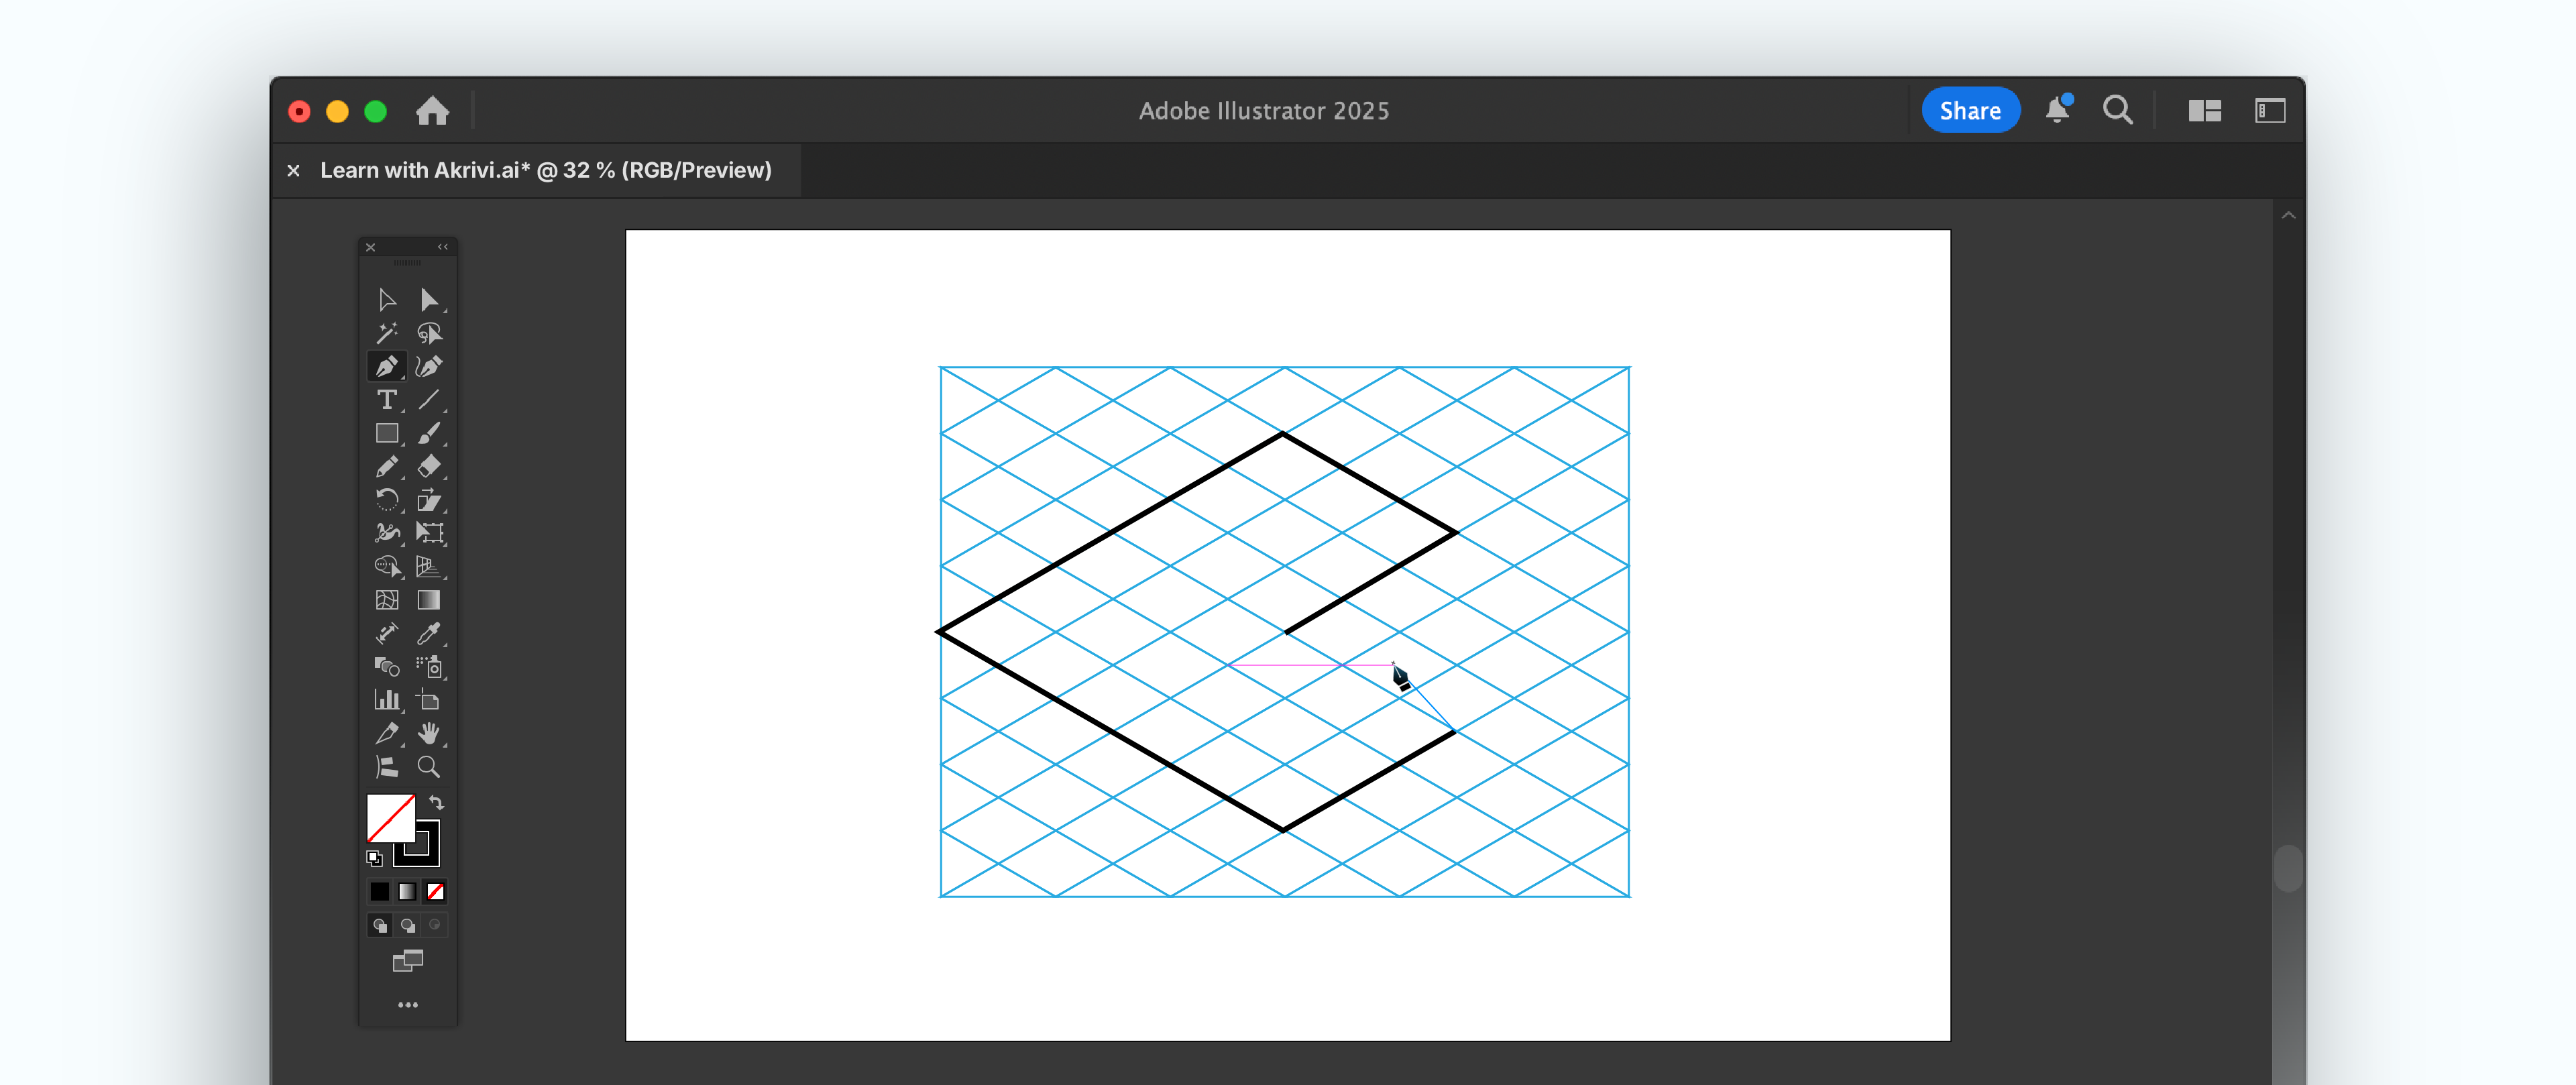
Step 5: Final Group and Lock.
- Select all the angled lines you've created. Group them (Ctrl/Cmd + G).
- Lock the layer (or Ctrl/Cmd + 2) or make guide (View > Guides > Make Guides). Now you have a precise manual isometric grid!
Bonus Step: Clean Up Uneven Grid Lines
After creating your grid, you might have lines extending past your main design area, if you are a nerd like me, you can’t let them slide. Here's how I clean them for a much tidier look:
- Draw a Bounding Frame: Use the Rectangle Tool (M) to draw a rectangle exactly around the area where you want your grid to be.
- Select All: Select all your grid lines AND this new bounding frame.
- Use Pathfinder Divide: Open the Pathfinder panel (Window > Pathfinder). Click the "Divide" icon (it's often the first one in the "Pathfinders" section). This will cut your grid lines at the edges of the frame.
- Select Outer Parts: Click outside your main grid area. Select one of the grid line pieces that extends beyond your bounding frame.
- Select Similar: Go to Select > Same > Stroke Color (or Stroke Weight if all your lines are the same). This will select all those unwanted outer pieces.
- Delete: Press Delete. There you have it – a much cleaner grid, perfectly contained!

Generate Logo Grids with Gridit™
While knowing manual methods builds great skill, sometimes I need speed and instant results.
I created Gridit, an adobe illustrator plugin to generate logo grids. Gridit includes the Base Grid Generator™ tool, which allows you to instantly create square, isometric, hex and golden ratio grids.
Free Logo Grid Templates
I've put together a FREE logo grid template as part of our Logo Grid Templates. It also includes an ebook, all about mastering logo grids inside Adobe Illustrator.
You can find the grid systems used in Gridit

Conclusion
Learning how to make a logo grid, especially base grids like square and isometric, is a key skill. It boosts your precision, balance, and professionalism.
Whether you build them by hand or use smart tools, understanding grids will transform your work.