The all-in-one automation suite for brand identity designers
Deliver flawless
Everything you need, in one poweful suite


How to Export Logo Files for Clients in Adobe Illustrator (Professional Workflow)
The exact process, file formats, and structure used to prepare a professional logo package for client delivery
Most designers know what files to include in a logo package. The part that slows things down is the actual export, setting up artboards correctly, choosing the right export method for each format, and making sure nothing gets flattened or shifted in the process.
This is the step-by-step workflow I use every time.
Related Reading: If you want to know exactly what files and folder structure to use before exporting, I have covered the full logo file structure for client delivery in a separate guide.
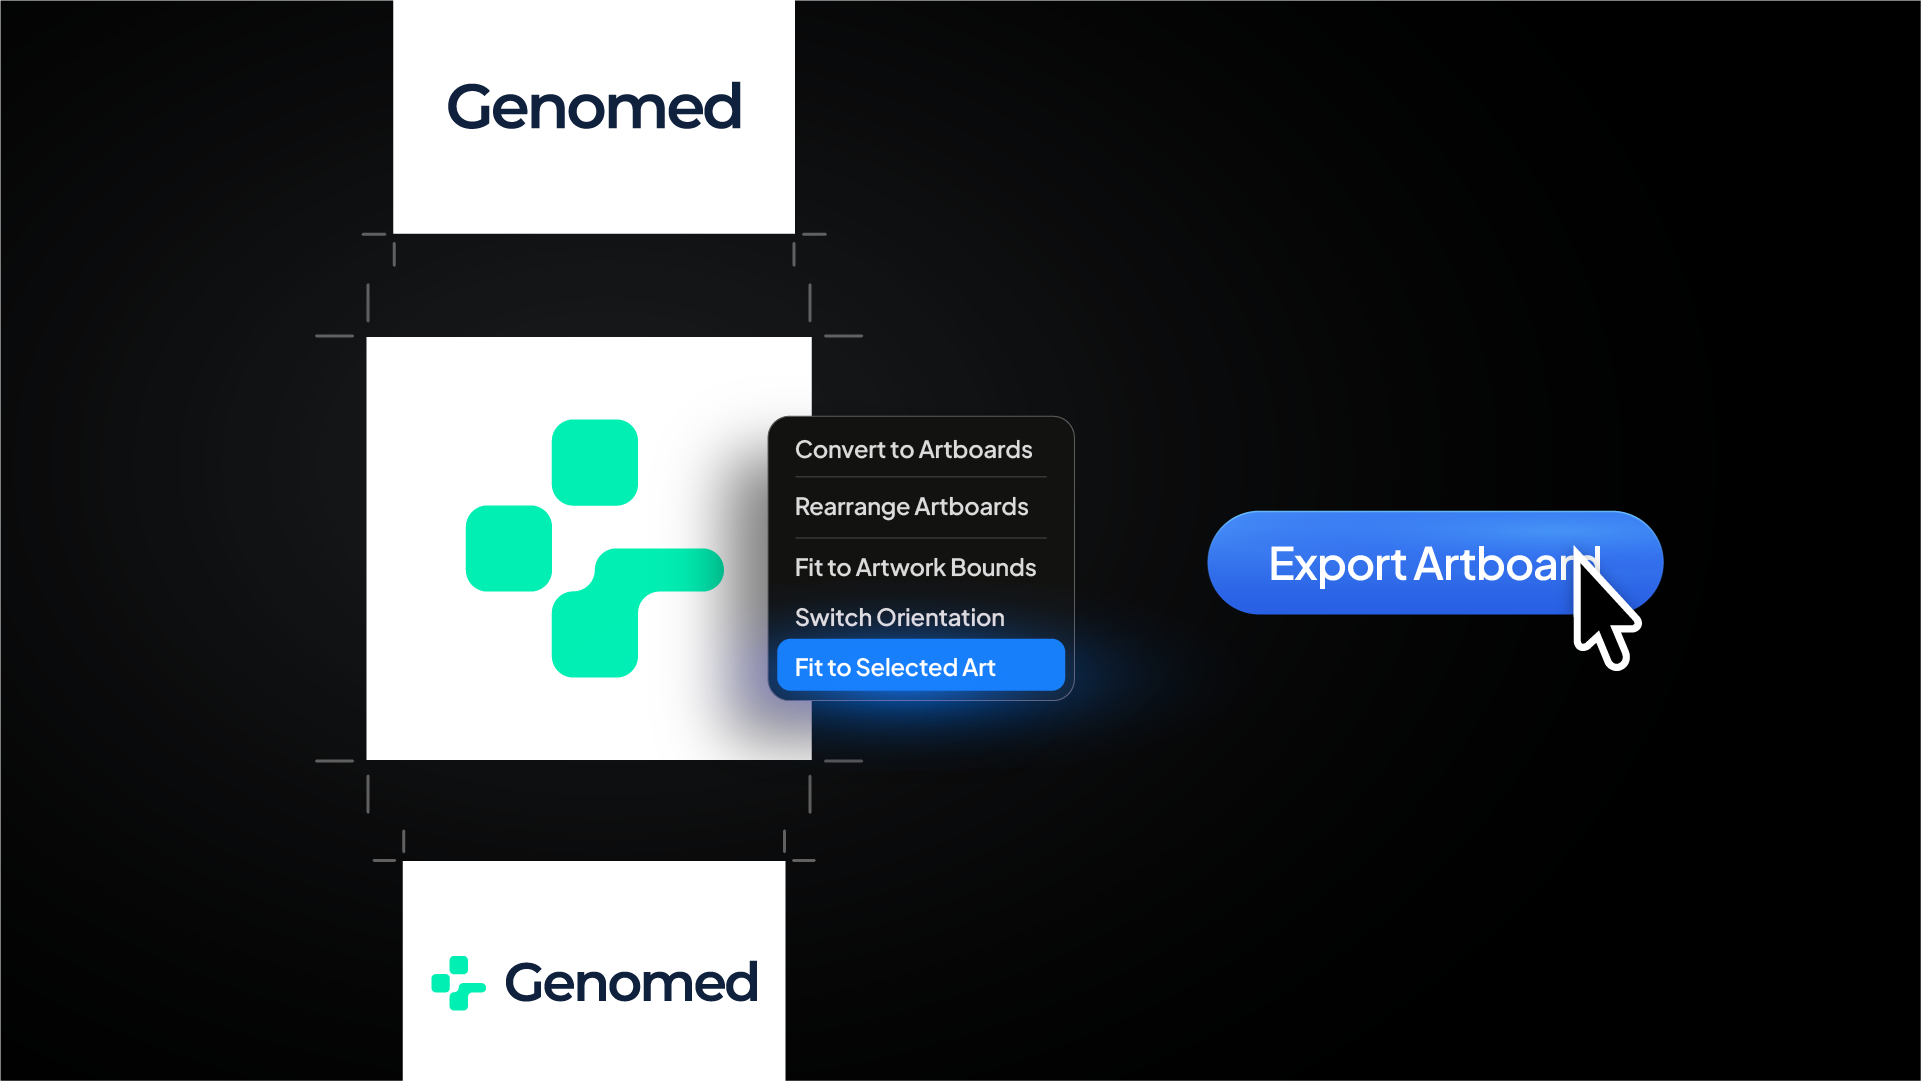
Step 1: Set up your artboards
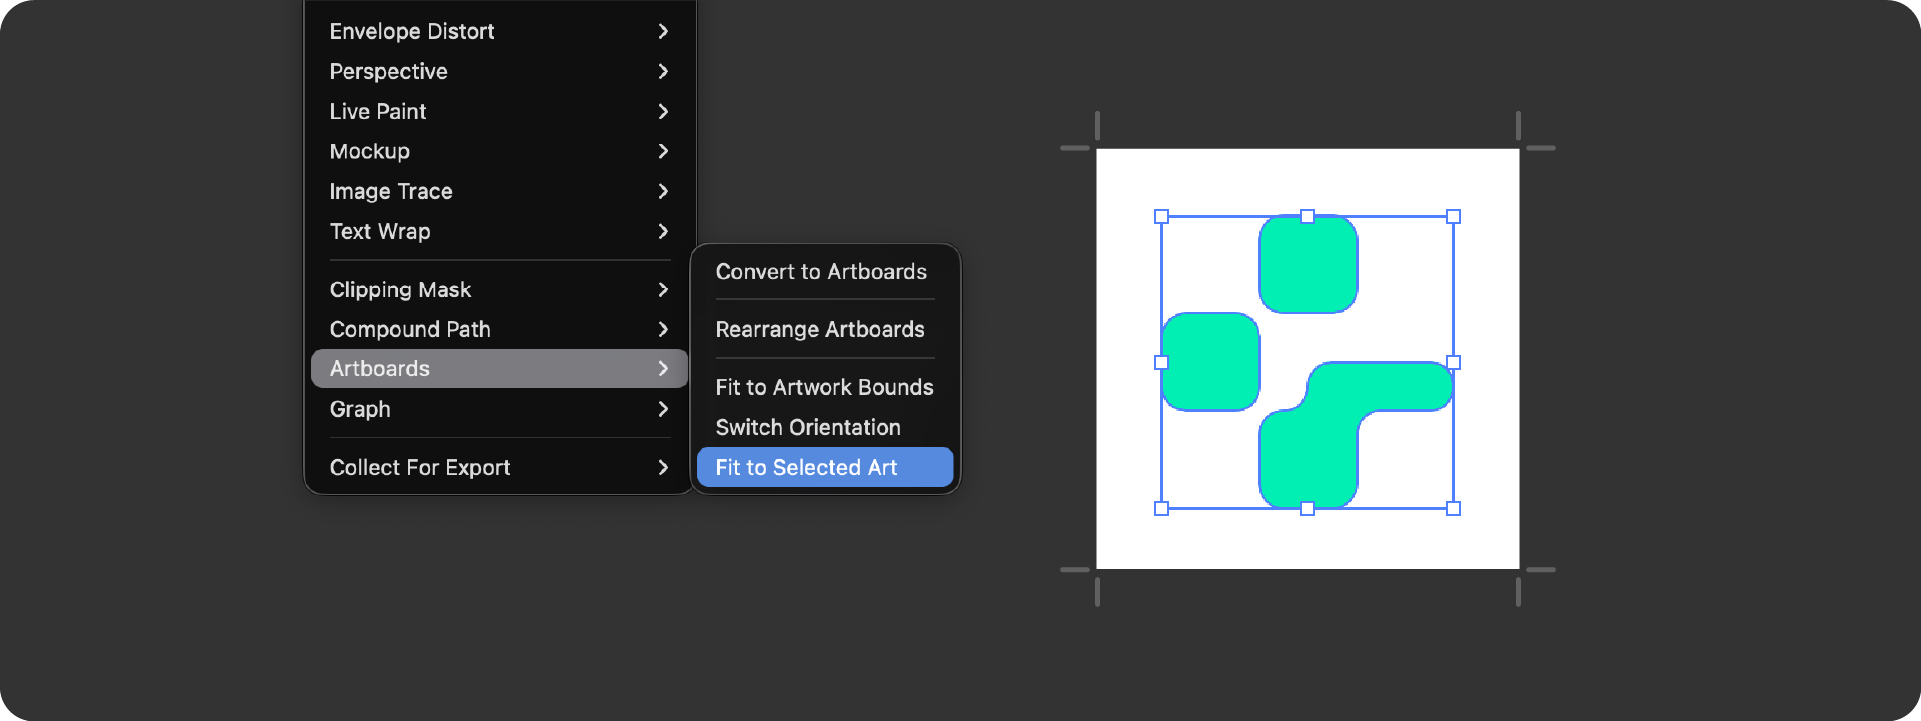
Before exporting anything, each logo variation needs its own artboard. Name them clearly in the Layers panel using the same naming convention you will use for the exported files.
Set each artboard to fit tightly around the logo with no extra white space. Use Object > Artboards > Fit to Artwork Bounds to snap the artboard to the exact edges of the logo. This ensures exported files do not include unnecessary padding that shifts the logo position unexpectedly.
Step 2: Export vector files (SVG and EPS)
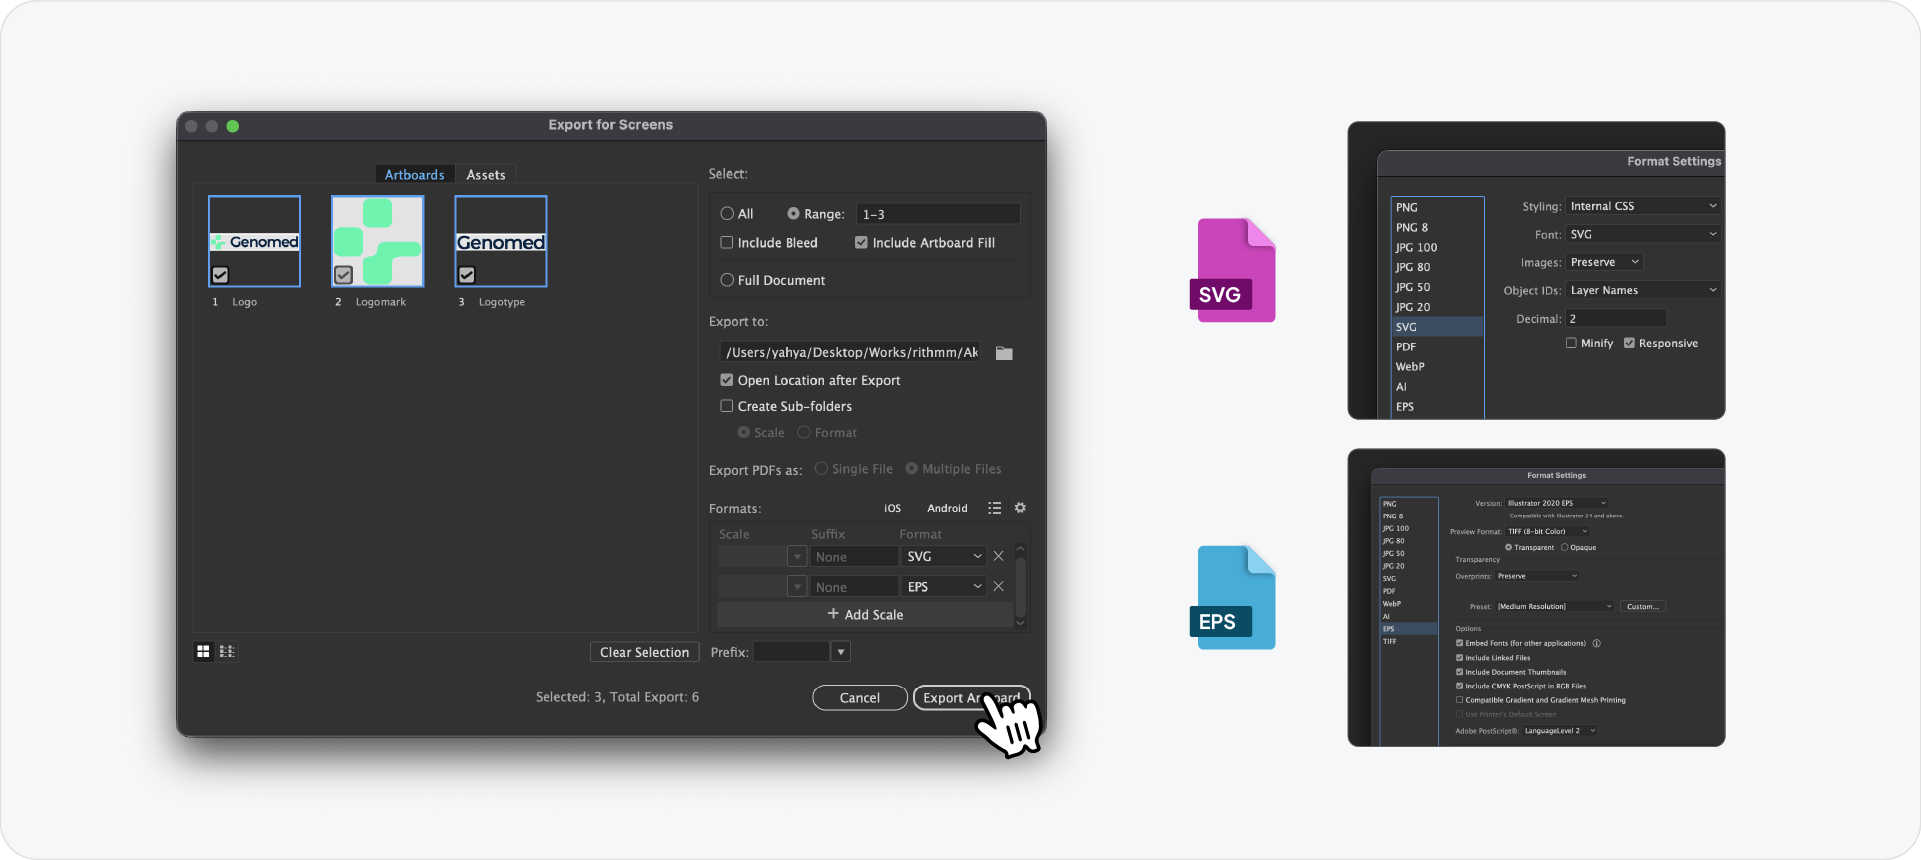
For SVG, go to File > Export > Export As, select SVG, and check Use Artboards. Export each artboard individually or all at once by selecting the range.
In the SVG Options dialog:
- Styling: Presentation Attributes
- Font: Convert to Outlines
- Images: Embed
- Object IDs: Layer Names
- Decimals: 2
- Minify: checked
- Responsive: unchecked for logo files
For EPS, follow the same Export As method and select EPS. In the EPS Options dialog, set the version to Illustrator 8 EPS for maximum compatibility with older print supplier software. Check Embed Fonts and make sure Preview is set to TIFF (8-bit Color).
Repeat this for both RGB (Digital) and CMYK (Print) versions by switching the document colour mode under File > Document Color Mode before each export.
Related Reading: For a breakdown of which colour variants to include per variation, I have written a full guide on what logo files to send to clients.
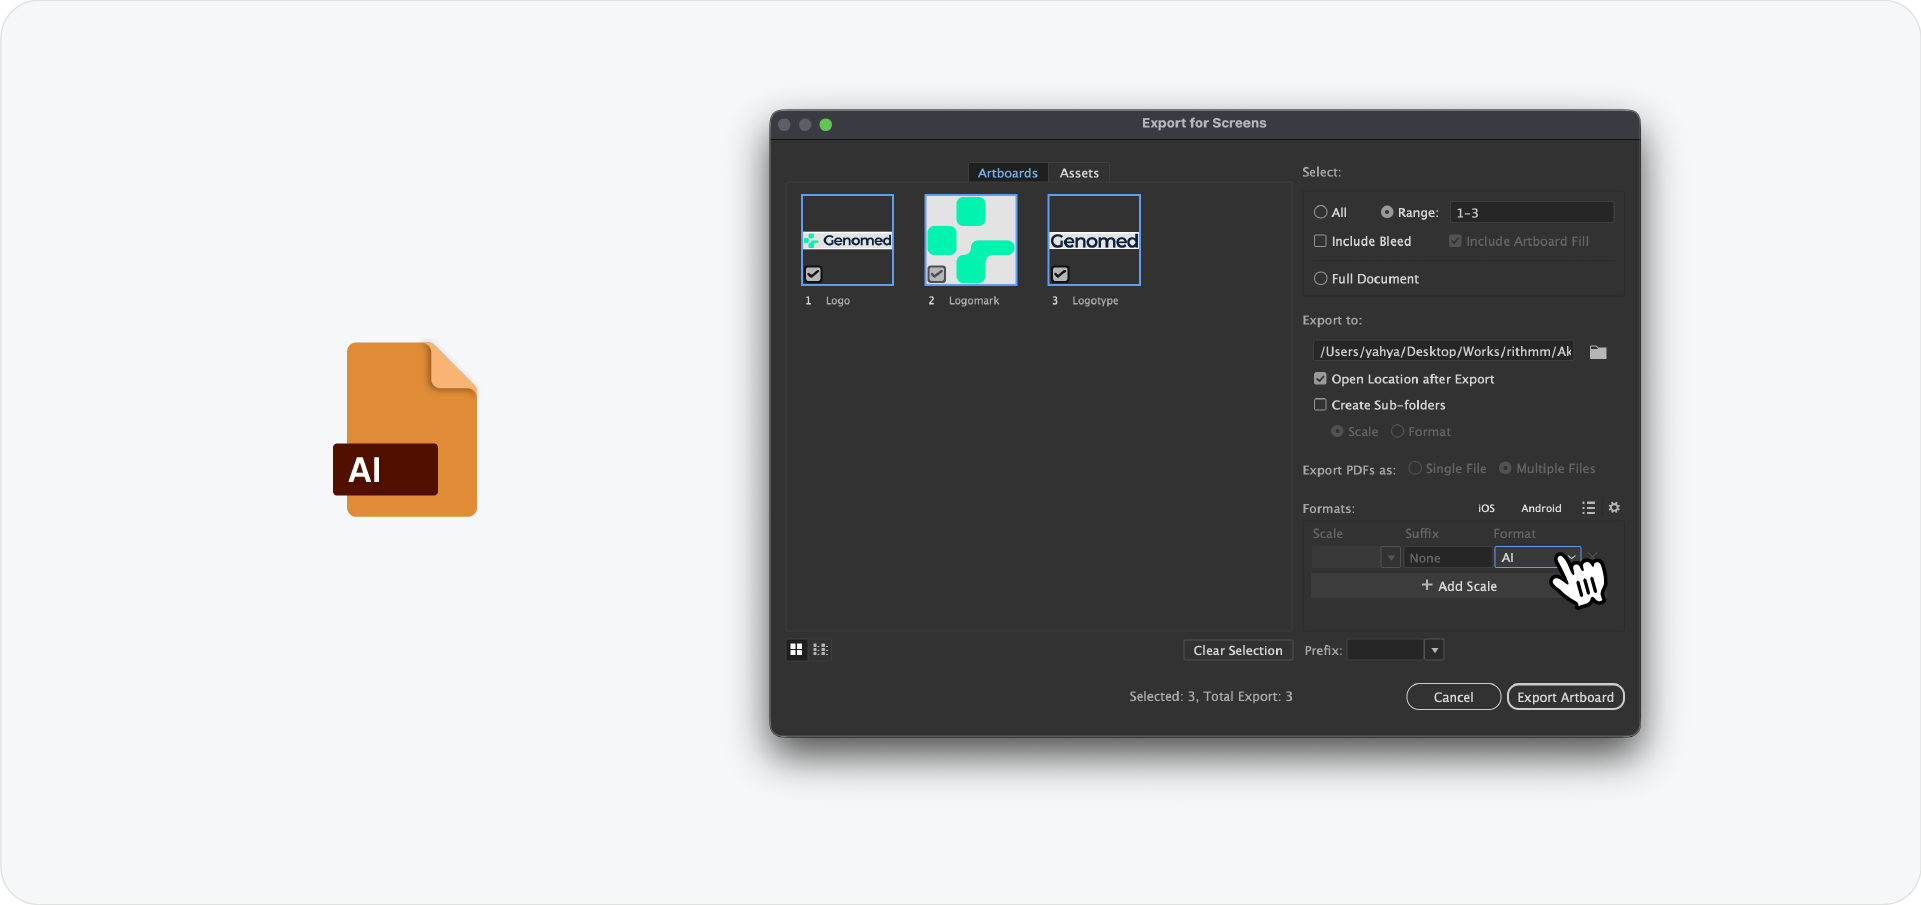
Step 3: Export PNG files
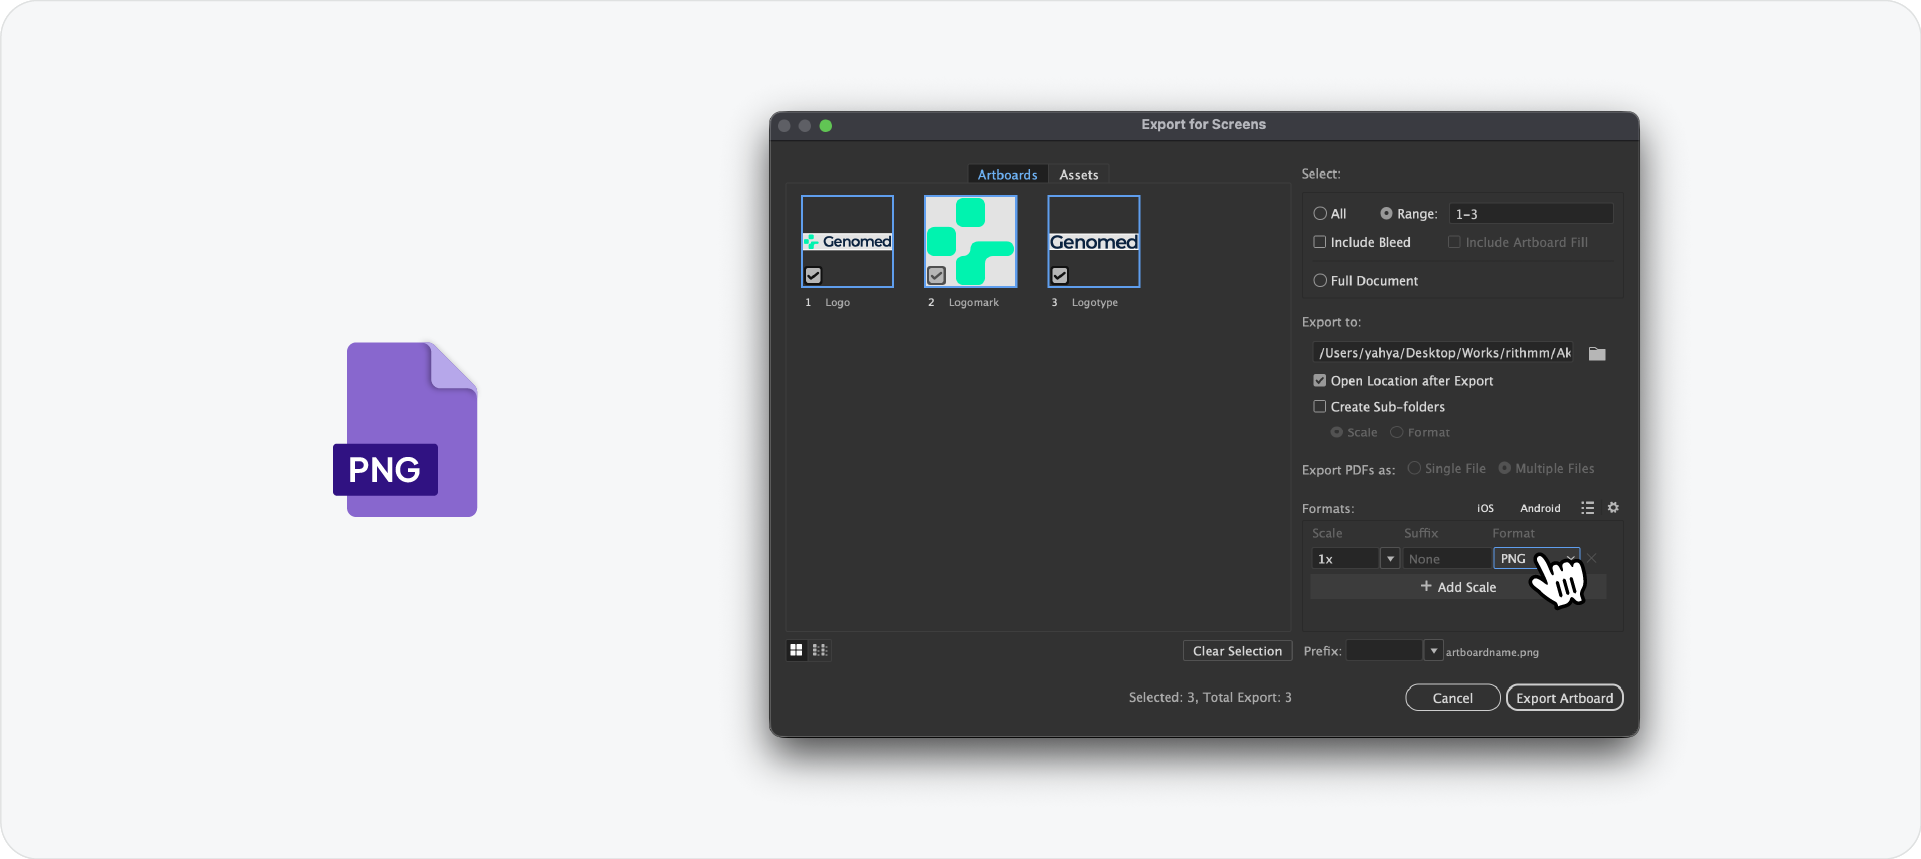
Go to File > Export > Export for Screens. Select the artboards you want to export and set the format to PNG.
For the primary large size, set scale to 1x and resolution to 72 PPI at 1920px on the longest edge. Add a second scale at 0.5x for the medium size and a third at 0.1x for the small version used in email signatures.
Make sure the background is transparent by checking that the artboard has no background rectangle behind the logo. If there is one, hide or delete it before exporting.
Step 4: Export JPG files
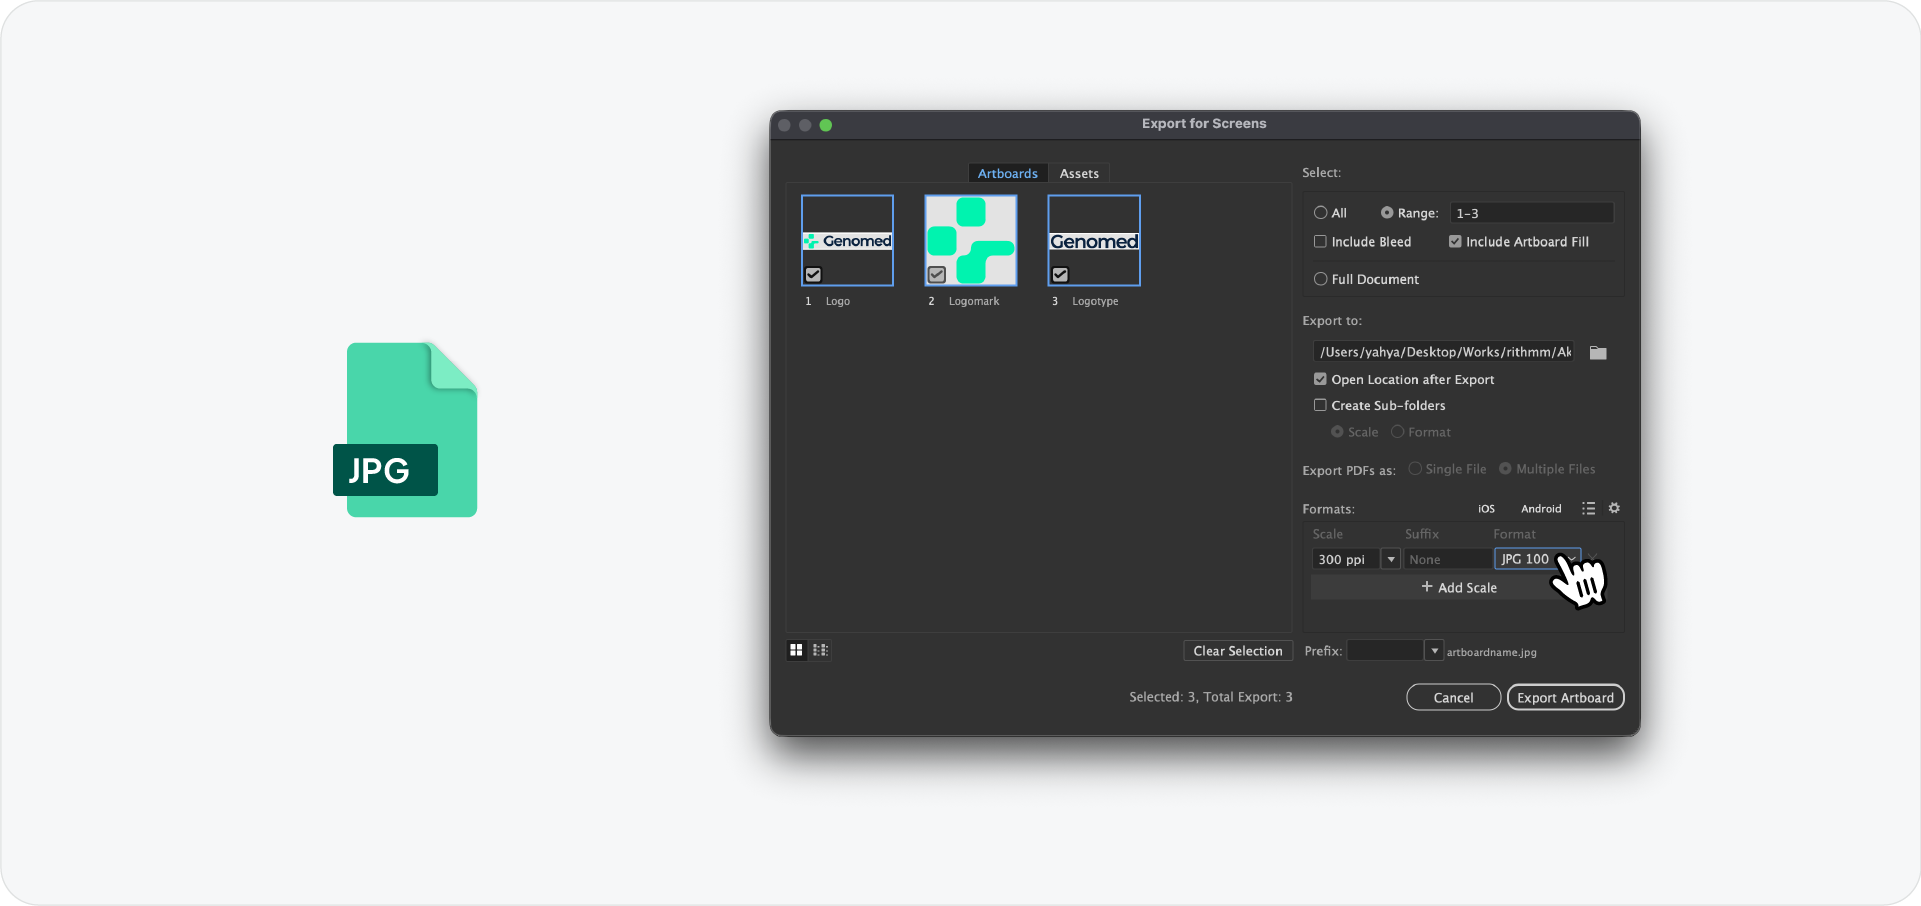
Follow the same Export for Screens workflow but select JPG. Set Image Quality to 100 for the primary file.
JPG does not support transparency, so make sure the artboard background is white before exporting the JPG versions. Add a white rectangle behind the logo on a separate locked layer, export, then delete or hide it again.
Step 5: Save the AI source file
Duplicate the working file and clean it up before including it in the package. Remove any guides, hidden layers, and artboards that are not part of the final delivery. Save it as a standard AI file with all fonts embedded.
Name it using the same convention as the rest of the package:
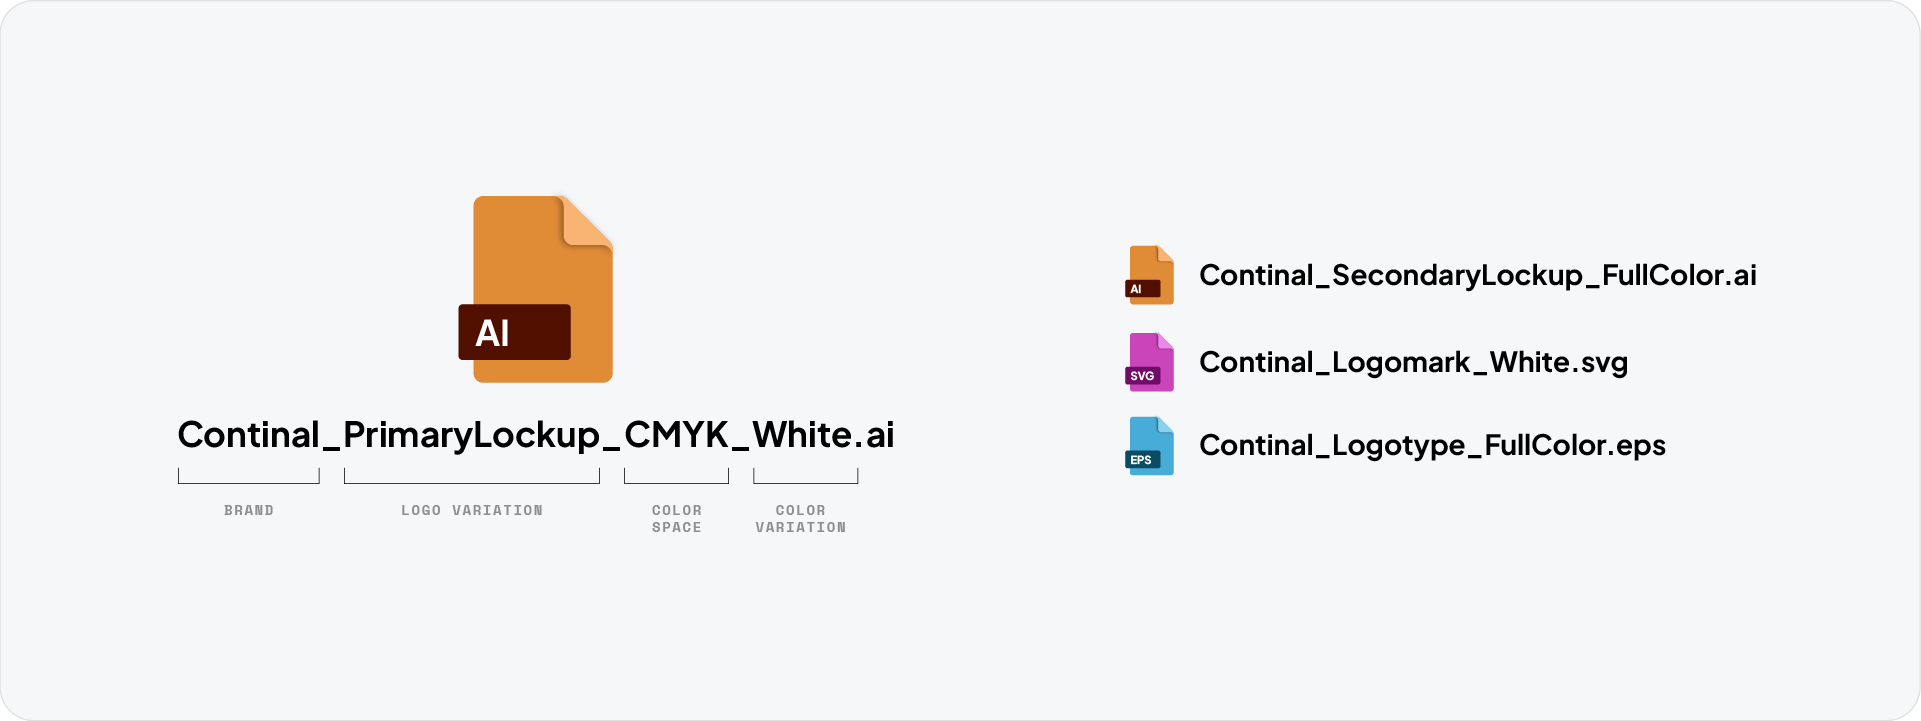
Step 6: Package everything into the folder structure
Once all files are exported, organise them into the folder structure before zipping. Double check that every variation has all four colour variants across every format before sending.
Download the Logo File Structure
To save time on every delivery, download the Logo File Structure freebie, a pre-built folder structure and naming guide ready to use on your next project.

Conclusion
The export process itself takes less time than setting it up the first time. Once the artboards are named and the export settings are saved, delivering a complete logo package becomes a repeatable, reliable step at the end of every project.