The all-in-one automation suite for brand identity designers
Deliver flawless
Everything you need, in one poweful suite


How to Create a Clearspace Grid Using Gridit
A guide to creating perfect clearspace grids in Illustrator with Gridit’s Clearspace Grid Generator.
We’ve all seen it happen. You design a beautiful logo, hand it off to the client, and a week later, you see it squeezed into a corner of a flyer with zero breathing room. It looks cramped and unprofessional.
To prevent this, you need to define a Clearspace Grid (or Safe Zone). This is an invisible boundary that ensures no other text or graphics intrude on the logo.
Creating these grids manually involves calculating ratios and drawing exclusion boxes by hand. In this guide, I’ll show you how to automate the entire process using the Clearspace Grid Generator in Gridit.
The Golden Rule: Grouping Your Logo
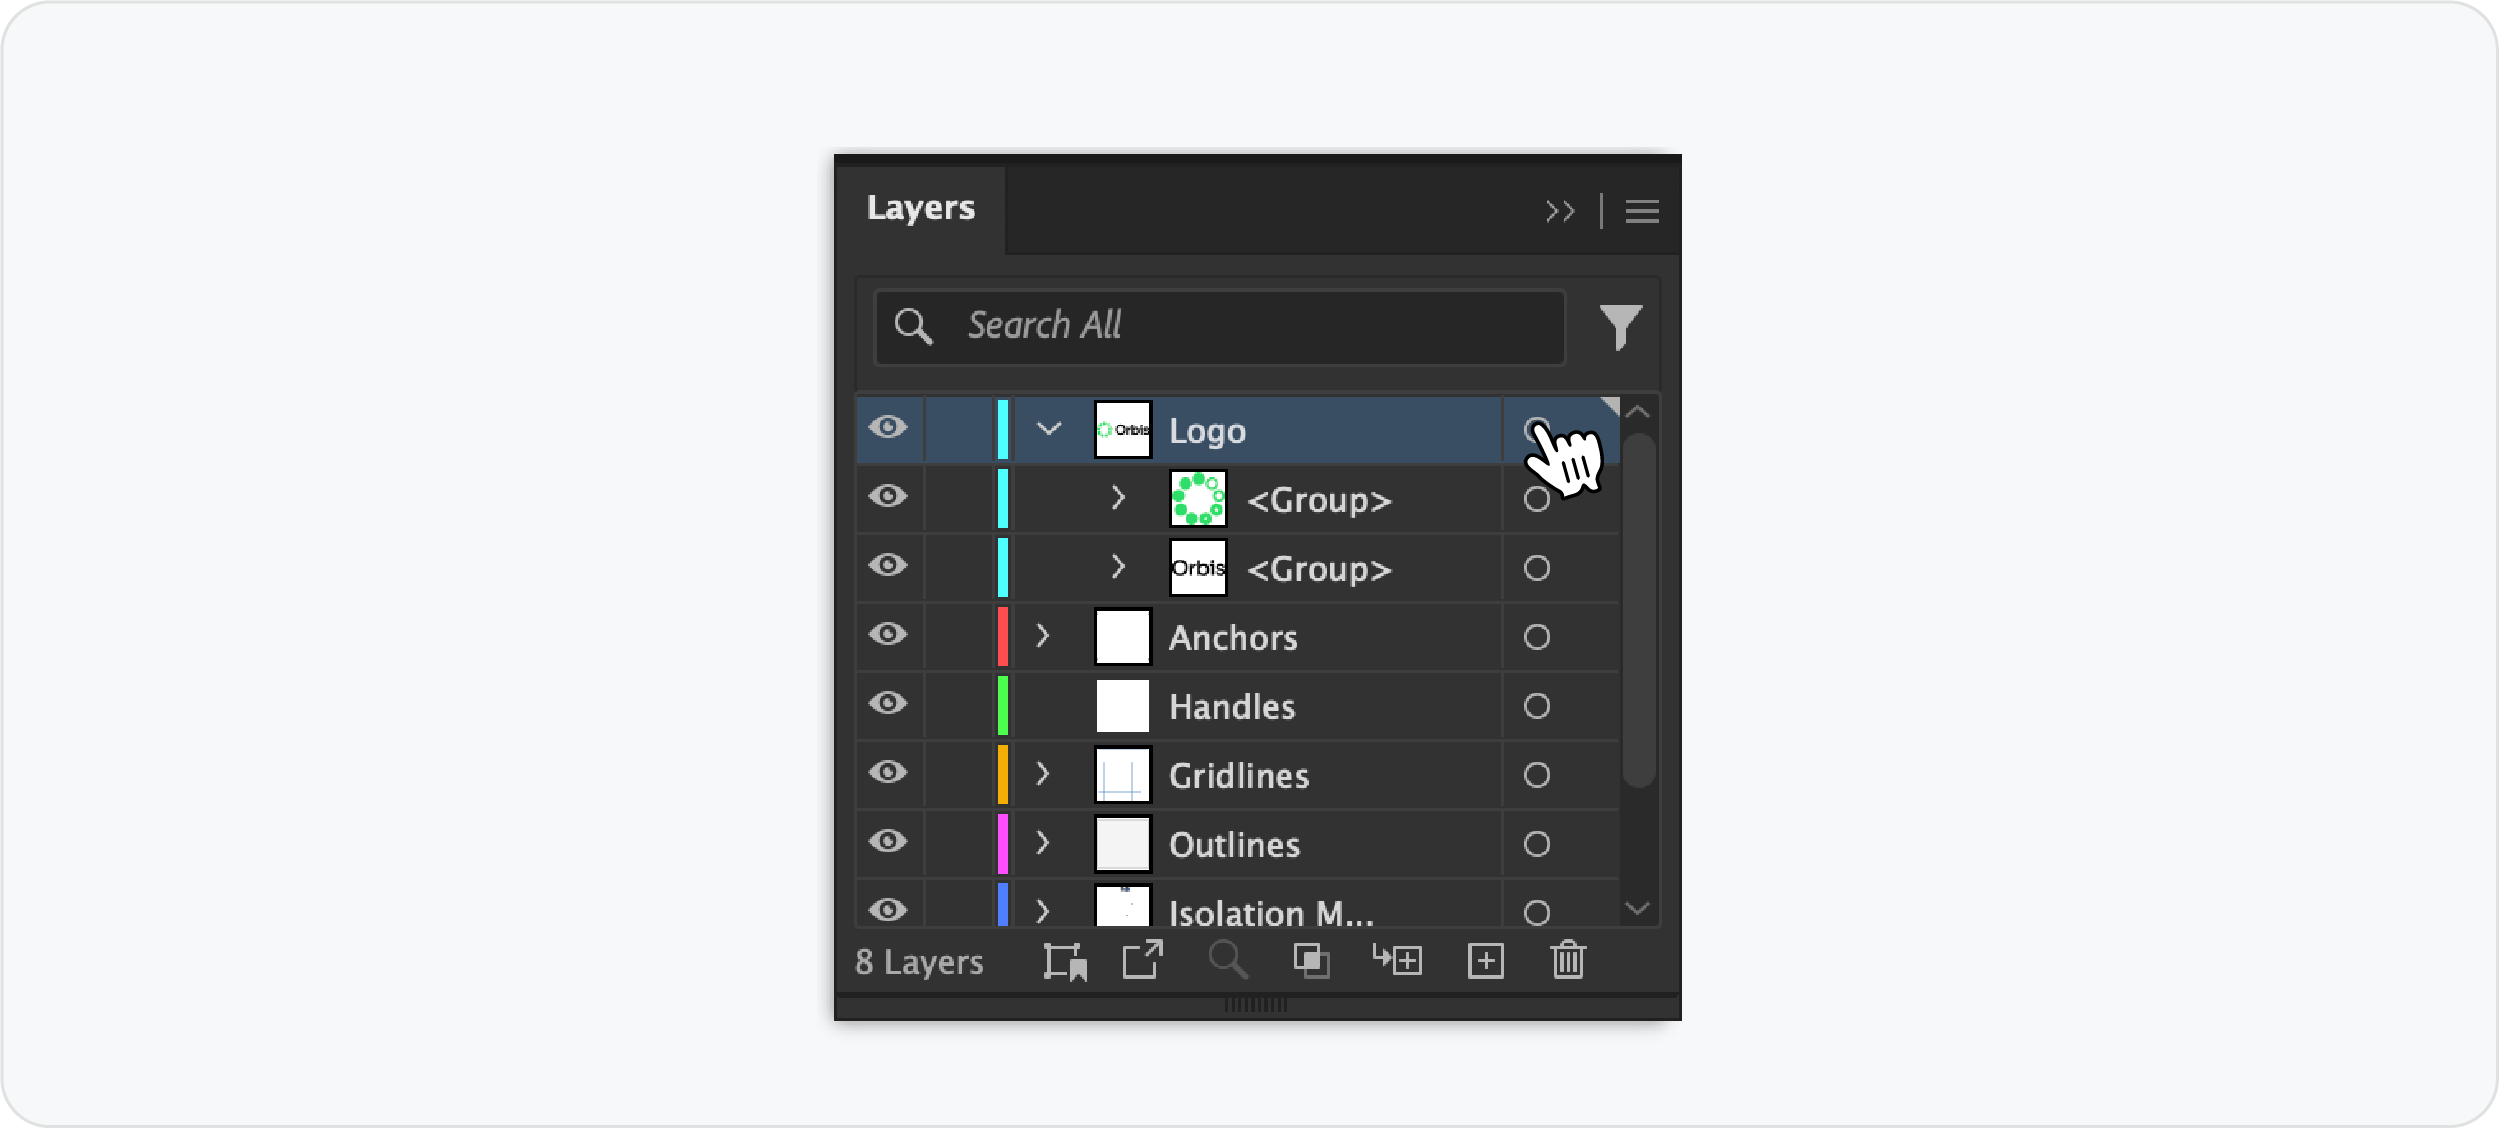
Before you click generate, there is one critical step you must get right: Grouping.
Gridit needs to know which part of your design is the "Icon" (Logomark) and which part is the "Text" (Logotype) to calculate the math correctly.
- For a Standalone Icon (1 Group): If you are just generating clearspace for a symbol, select all the vector parts and group them (Cmd/Ctrl + G).
- For a Full Lockup (2 Groups): Group your icon separately. Group your text separately, not together
Step 1: Open the Extension
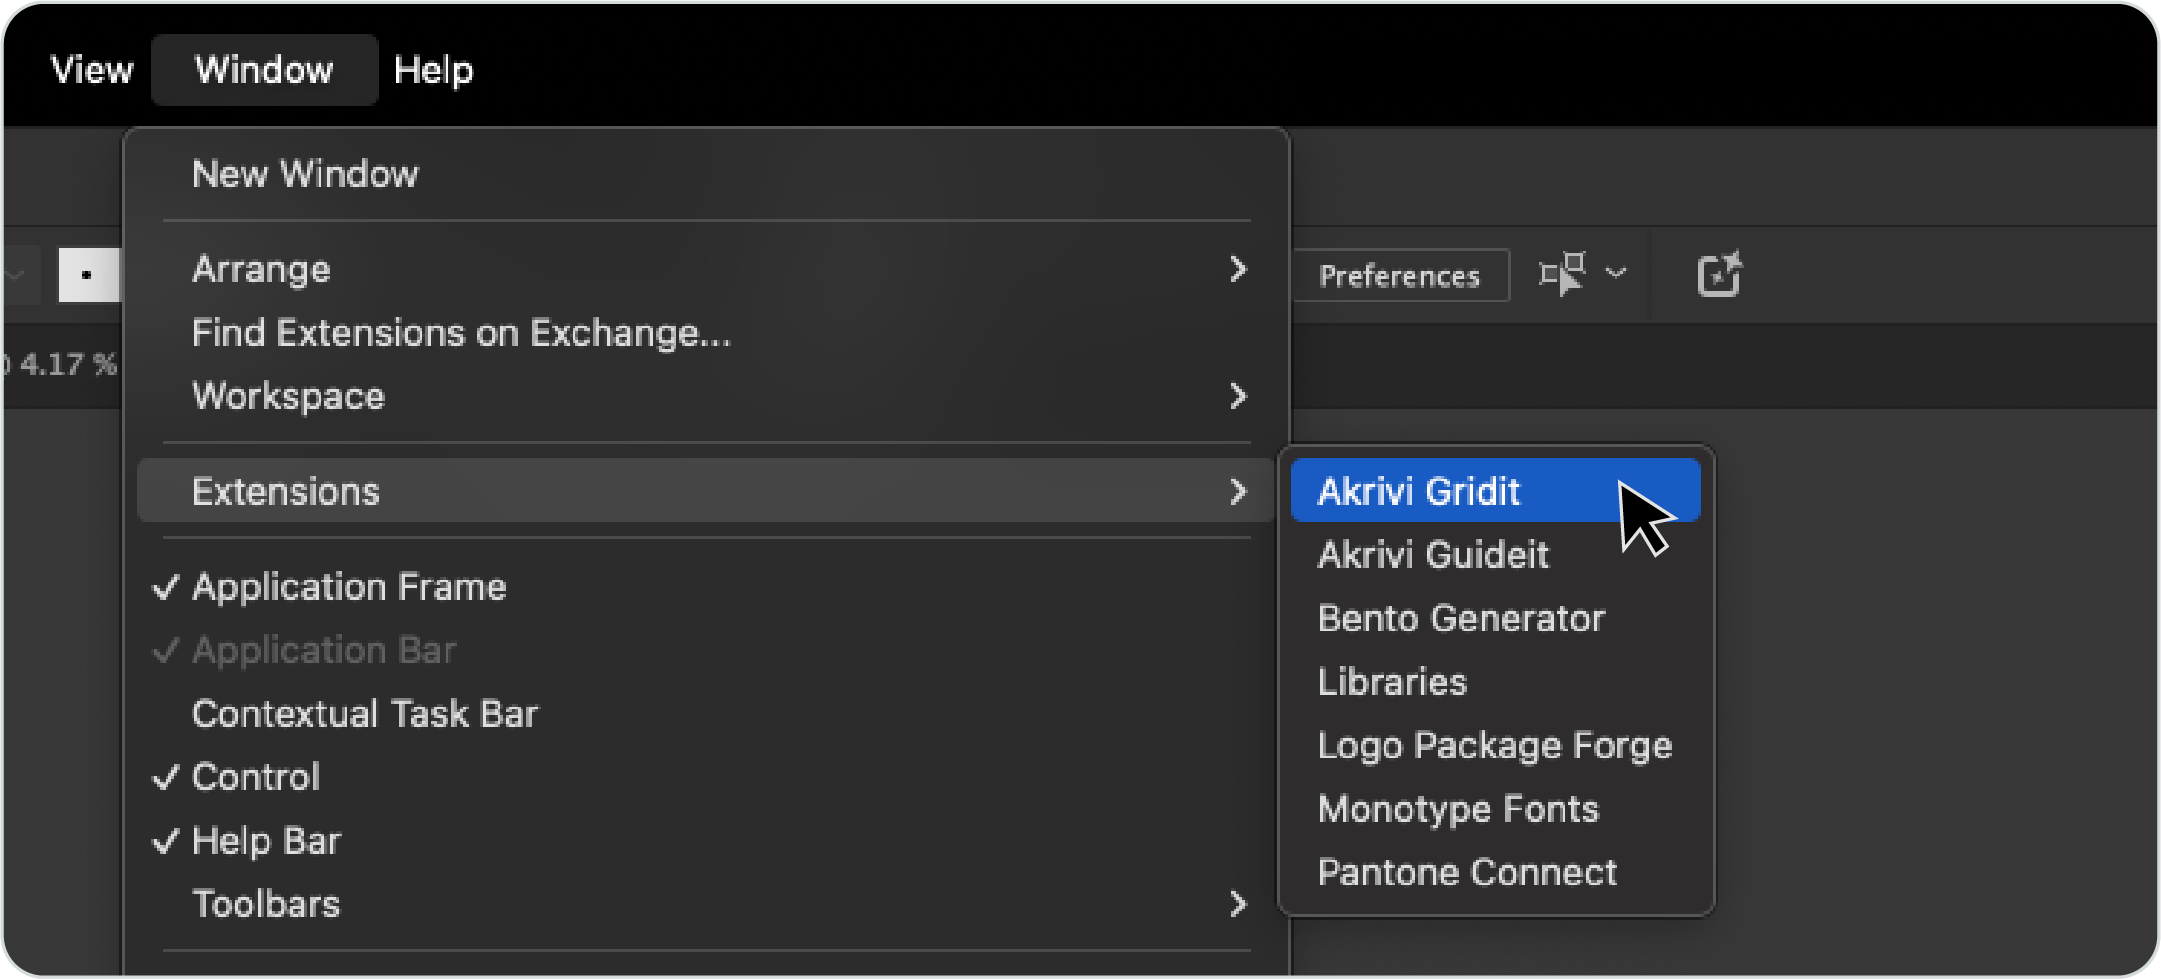
Once your logo is grouped, you need to open the tool.
Navigate to Window > Extensions > Akrivi Gridit in the top menu bar. This will open the panel where you can access the Clearspace Grid Generator tab.
Step 2: Choose Your Exclusion Mode
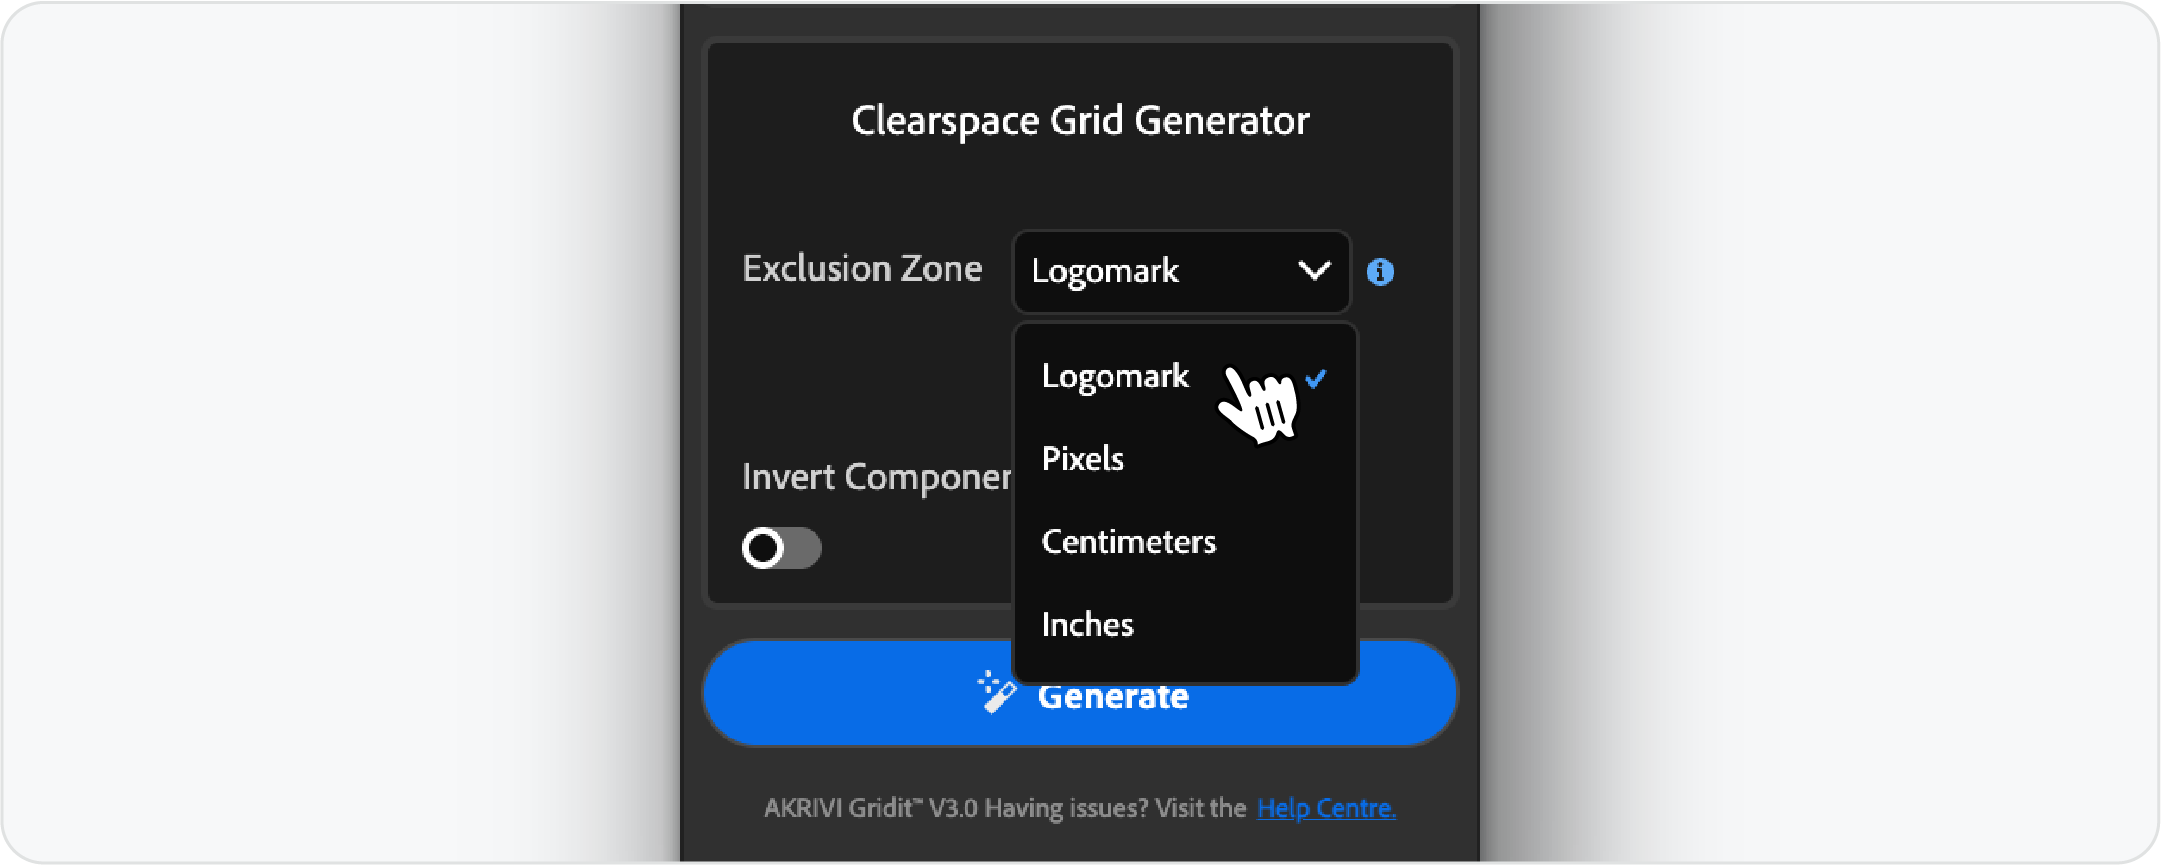
Once your logo is grouped and selected, you have two ways to define the empty space around it.
Option A: Relative Sizing (The "Logomark" Setting)
This is the most professional method. It uses a portion of your actual logo (usually the height or width of the icon) as the unit of measurement.
- Why use it: It ensures the clearspace scales perfectly. If the logo gets bigger, the safe zone gets bigger.
Option B: Fixed Measurement (Pixels/Inches)
You can also set a specific value, like 20px or 1cm.
- Why use it: This is great for specific print requirements or digital banners where you have a hard limit on margins.
Step 3: Generating for a Logomark (1 Group)
If you are working with just a symbol:
- Select your grouped icon.
- Set the Exclusion Zone to Logomark (or your preferred unit).
- Click Generate.
Gridit will instantly draw a bounding box around the icon and visual indicators showing the safe zone.
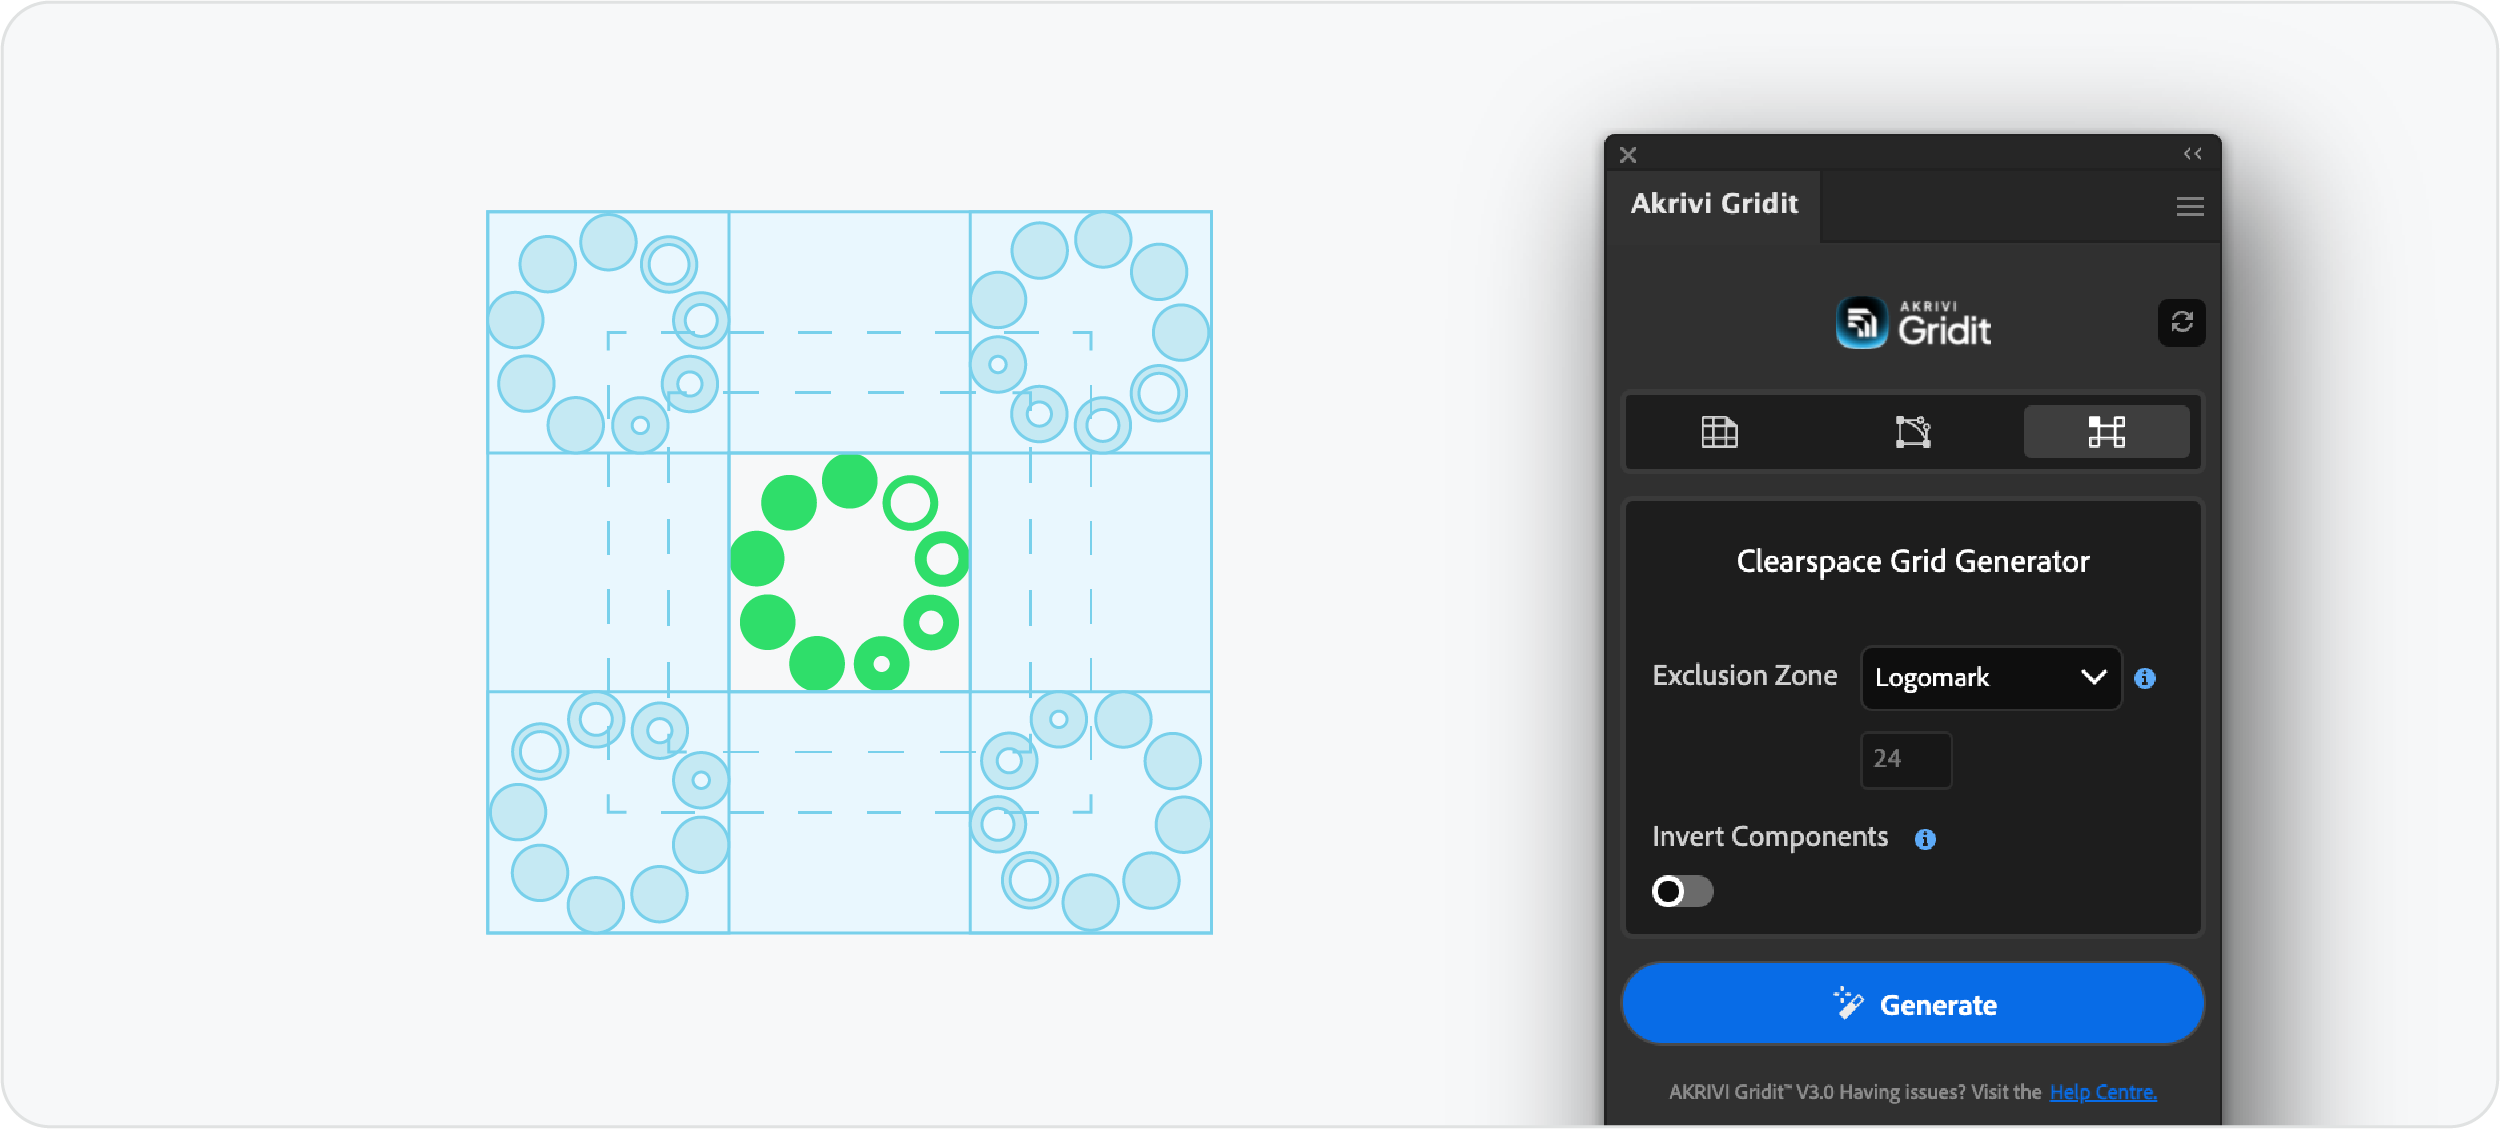
Step 4: Generating for a Full Lockup (2 Groups)
This is where the tool really shines. When you have a full logo with text:
- Select your main group (which contains the separate Icon group and Text group).
- Set the Exclusion Zone to Logomark.
- Click Generate.
Gridit doesn't just draw a box; it creates a comprehensive spatial system. It automatically:
- Detects your logomark within the group to use as the measurement key.
- Places faded copies of the logomark in the corners to visually define the safe zone.
- Generates a grid structure with full, half, and quarter lines to demonstrate precision.
Watch the Tutorial
If you want to see exactly how I group my layers and use the tool in real-time, check out this video.
Start Automating Your Grids
Defining clearspace is a small detail that makes a massive difference in how a brand is perceived. With Gridit, you can ensure your logos always have the room they need to stand out, without doing the math yourself.
You can try the Clearspace Grid Generator for free in Akrivi Studio.
Conclusion
A clearspace rule is the best way to protect the integrity of your logo designs. By using an automated tool like Gridit, you ensure that this rule is applied consistently and mathematically correctly every single time, saving you time and helping your clients keep their brand looking professional.