The all-in-one automation suite for brand identity designers
Works with Adobe Illustrator 2021 - 2026
Deliver flawless
Everything you need, in one poweful suite

Try Akrivi Studio, includes automated templates that generates layouts for you
Best Logo Export Settings for Clients in Adobe Illustrator

The correct export settings for every format in your logo package
Most designers know which formats to include in a logo package. Where things go wrong is in the settings. A PDF exported without the right preset, an SVG with embedded rasters, or a PNG exported at the wrong size. These are the kinds of mistakes that come back as client complaints or reprints.
Here are the correct export settings for every format, covering both web and print.
Watch tutorial
Related Reading: For the complete folder structure to organise all exported files, download the Logo File Structure for Client Delivery.
Before you export: artboard setup

Every logo variation needs its own named artboard. Before running any export, go to Object > Artboards > Fit to Artwork Bounds on each artboard. This snaps the artboard tightly to the logo with no extra white space, so exported files do not include unnecessary padding.
Name each artboard clearly using the variation name: Primary Lockup, Secondary Lockup, Logomark, Logotype. This name carries through to exported file names when using Export for Screens.
SVG export settings
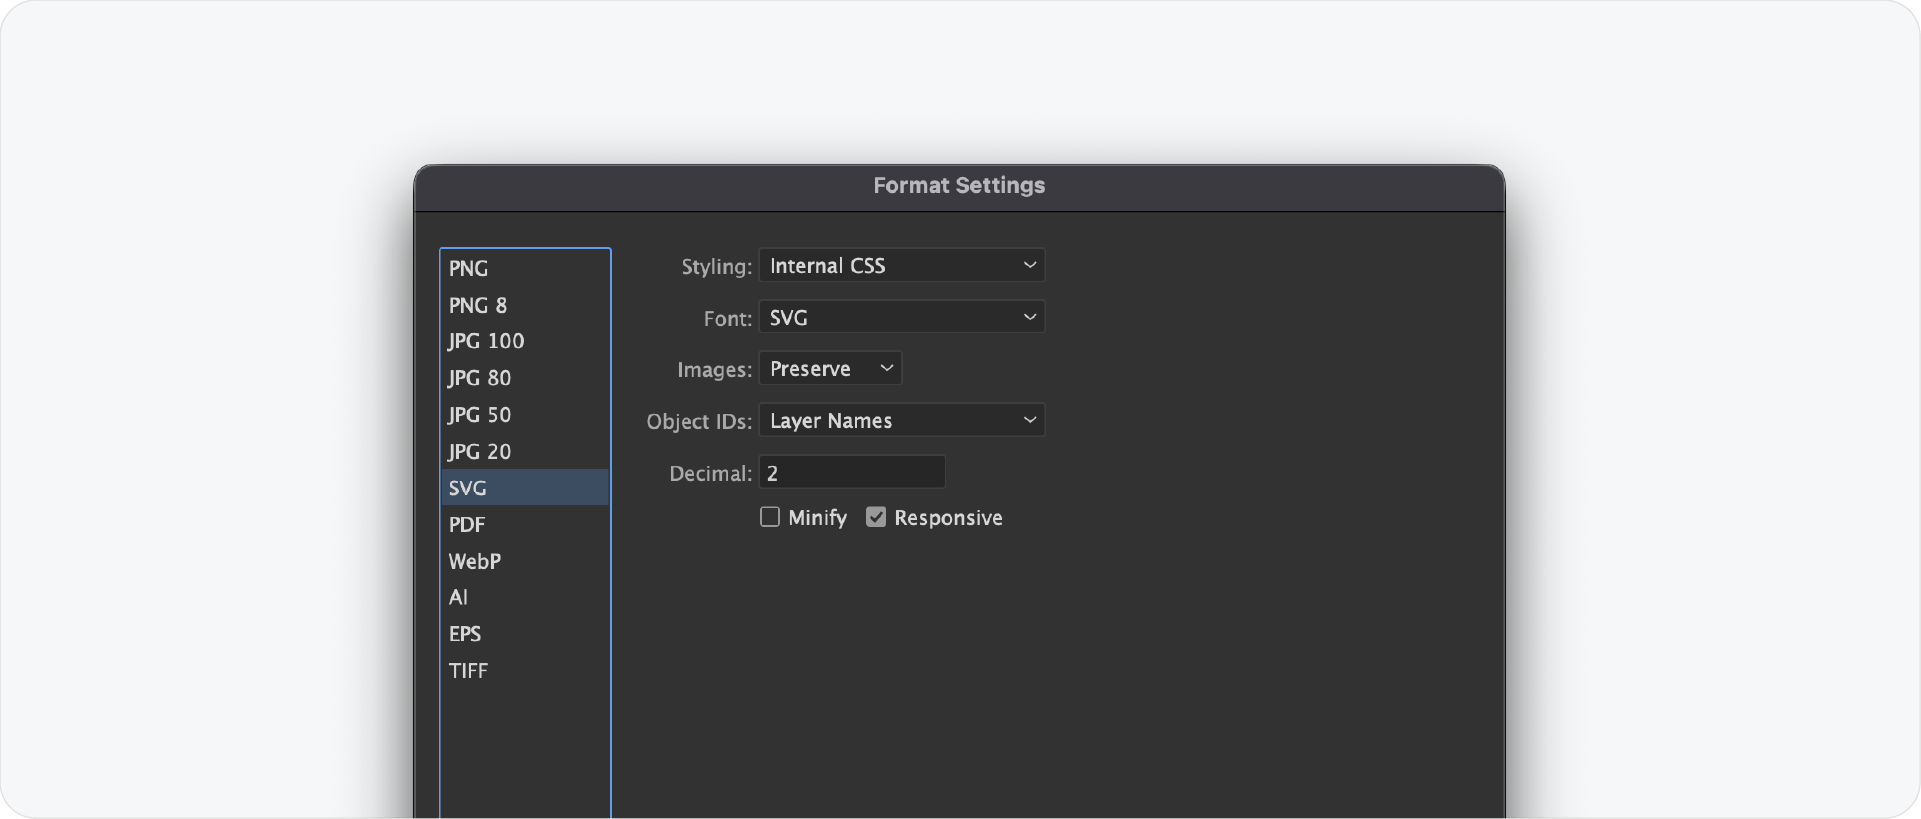
Method: File > Export > Export As > SVG, check Use Artboards
Settings:
- Styling: Presentation Attributes
- Font: Convert to Outlines
- Images: Embed
- Object IDs: Layer Names
- Decimals: 2
- Minify: On
- Responsive: Off
Convert all fonts to outlines before exporting SVG. An SVG with live text will break if the client's browser or platform does not have the font installed.
PDF export settings
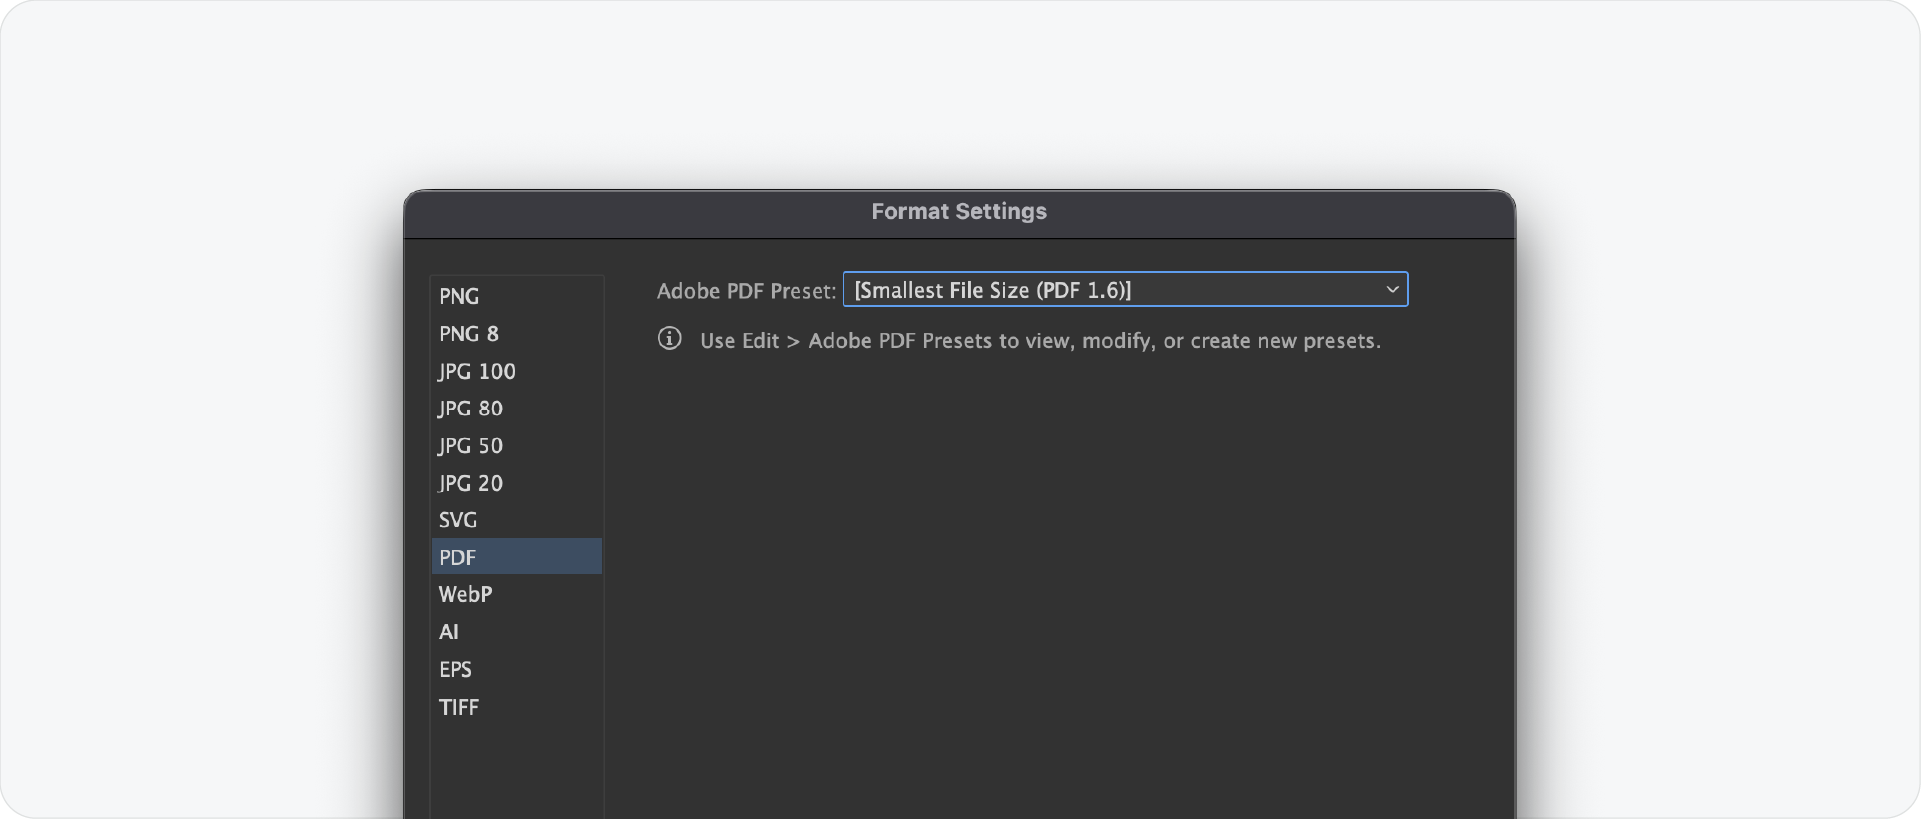
Method: File > Save a Copy > Adobe PDF
Settings for digital sharing:
- Preset: High Quality Print or PDF 1.4
- Compatibility: Acrobat 5 (PDF 1.4)
- Compress Text and Line Art: On
- Do not downsample images
Settings for professional print:
- Preset: PDF/X-1a or PDF/X-4
- Colour Conversion: Convert to CMYK
- Output Intent: set to the relevant print profile
Always check the document colour mode is correct before exporting. Go to File > Document Color Mode and confirm RGB for digital or CMYK for print before saving the PDF.
EPS export settings

Method: File > Export > Export As > EPS, check Use Artboards
Settings:
- Version: Illustrator 8 EPS
- Preview: TIFF (8-bit Colour)
- Transparency: Flatten transparency before export
- Fonts: Convert to Outlines before saving
- Include Linked Files: On
Illustrator 8 compatibility gives the widest support across print suppliers, embroidery machines, and sign makers running older software.
PNG export settings

Method: File > Export > Export for Screens
Settings:
- Format: PNG
- Background: Transparent (no fill behind the logo on the artboard)
- Switch scale type to Width and add four sizes:
- 16w suffix @16px (favicon)
- 512w suffix @512px (social media)
- 1024w suffix @1024px (general digital use)
- 2048w suffix @2048px (high-res and retina)
Export for Screens generates all four sizes in one run. Make sure no white rectangle sits behind the logo on the artboard before exporting, otherwise the transparent background will not work.
Related Reading: For a full breakdown of why these four sizes are used, read the logo sizes guide.
JPG export settings
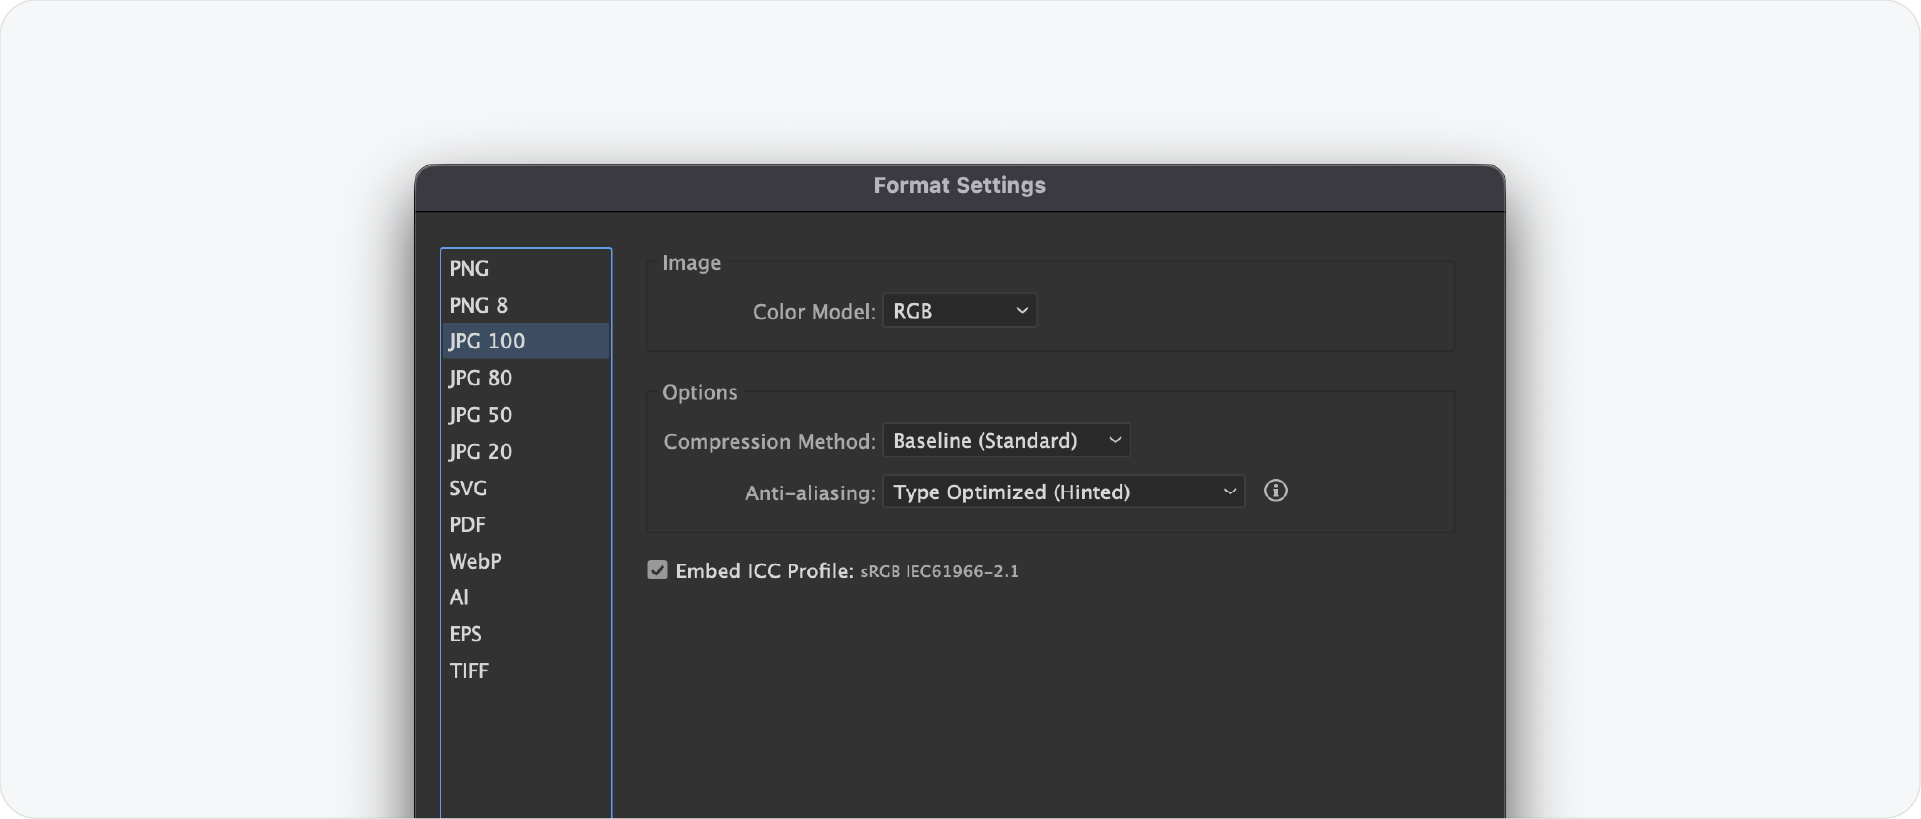
Method: File > Export > Export for Screens
Settings:
- Format: JPG
- Quality: 100
- Same sizes as PNG using Width: 16w, 512w, 1024w, 2048w
- Add a white rectangle behind the logo on the artboard before exporting. JPG does not support transparency
Export JPG at 100% quality. Anything lower introduces compression artefacts that are particularly visible on logo edges.
AI source file settings
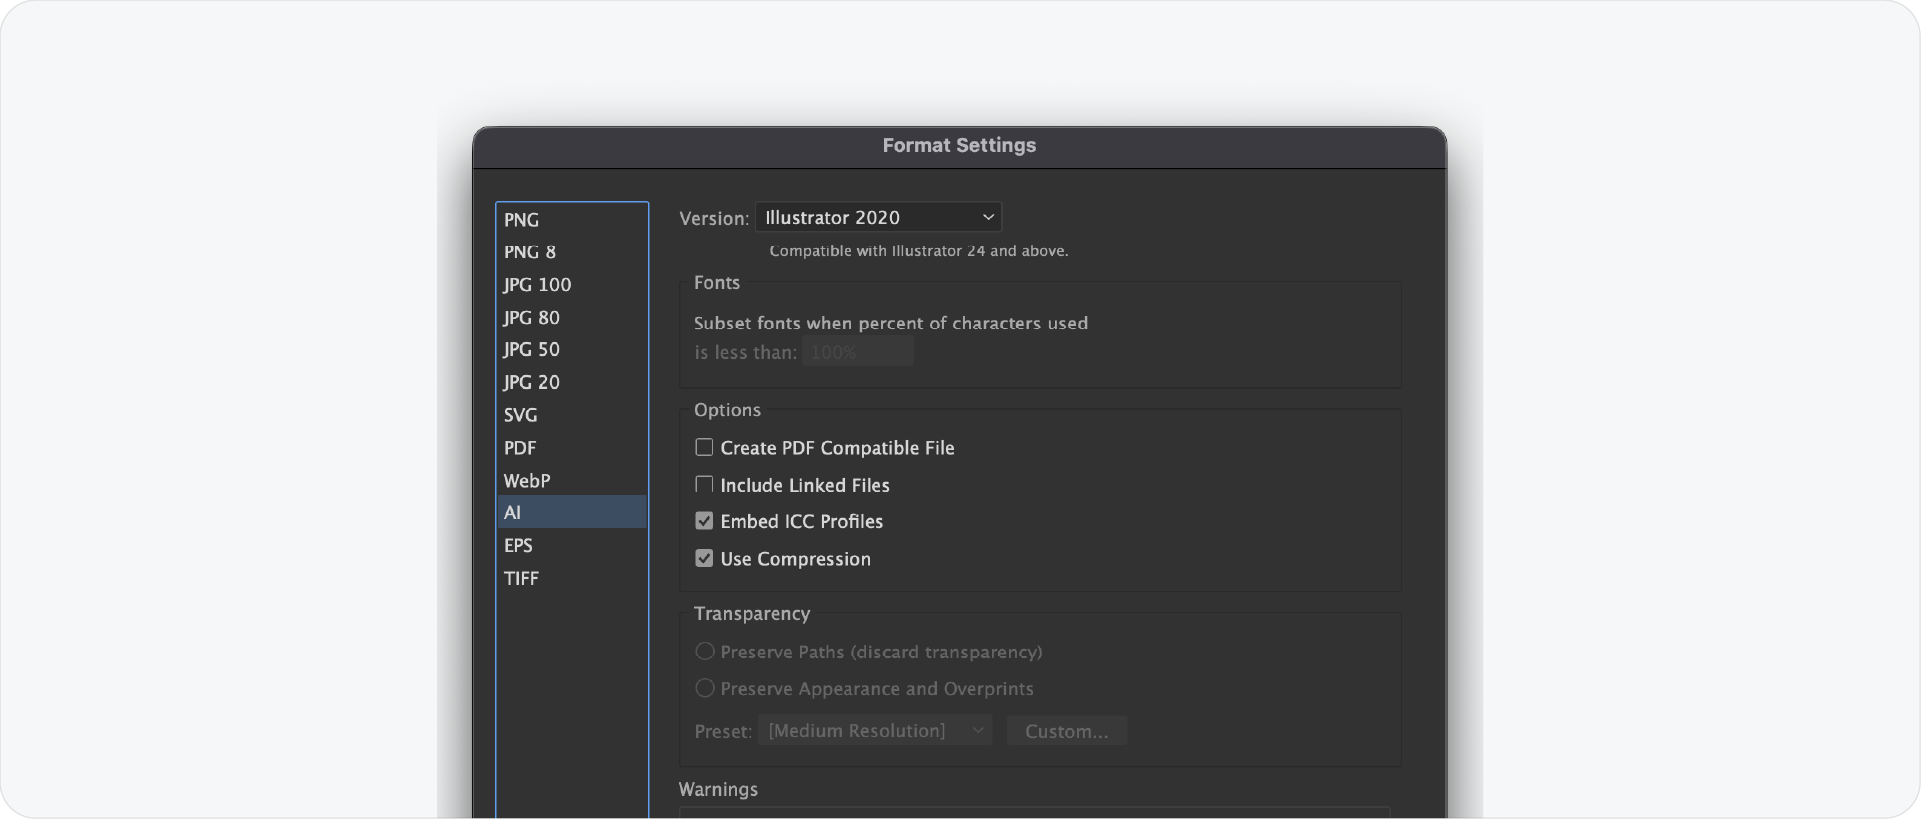
Method: File > Save As > Adobe Illustrator (AI)
Settings:
- Version: Latest Illustrator version
- Create PDF Compatible File: On
- Include Linked Files: On
- Use Compression: On
- Save each artboard to a separate file: Off
Keep all layers intact and unlocked. Do not flatten the file before saving. The AI file is the client's source of truth. The next designer needs to be able to open it and work from it immediately.
Full export settings reference
Related Reading: For a full breakdown of each format and what it is used for, read the Ultimate Guide to Logo File Formats 2026.
Skip the manual settings with Exportit
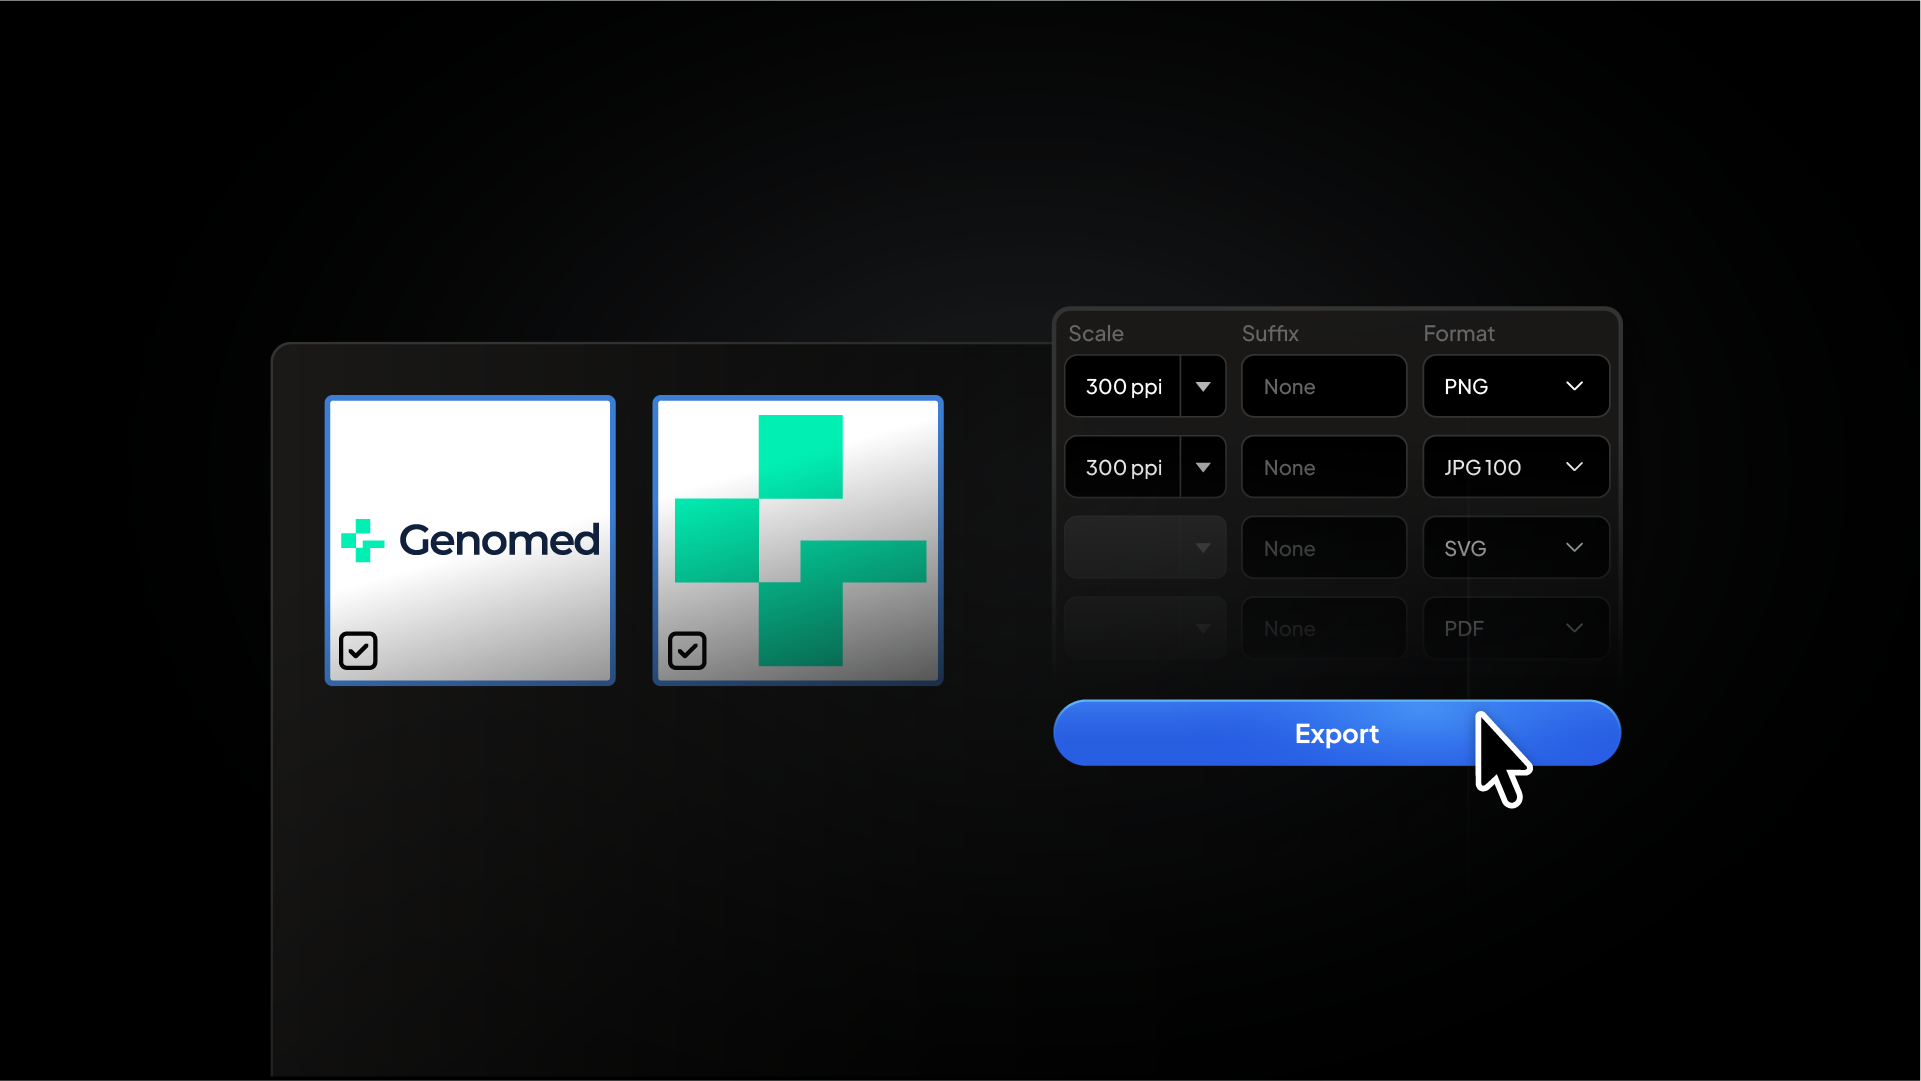
Every setting above is handled automatically by Exportit inside Adobe Illustrator. Select your logo lockups, check Web and Print, enter the client name, and Exportit exports every format at the correct settings, in the correct colour mode, at the correct sizes, organised into the right folder structure.
No export dialogs, no manual presets, no switching between colour modes. Exportit runs the entire export in one go so the complete logo package is ready to deliver in minutes.
Generate Your Logo Files with Exportit

Conclusion
Getting export settings right across every format takes attention to detail. Use the reference table above as a checklist on every project. And if you want to skip the manual process entirely, Exportit handles every format, setting, and colour mode automatically from inside Illustrator.